
by Kate | May 16, 2020 |
Two is ALWAYS better than one, so why not make this Coconut Orange Tres Leches Cake and Chai Gulab Jamun all in one go and maximise your time in the kitchen!
SPONSORED
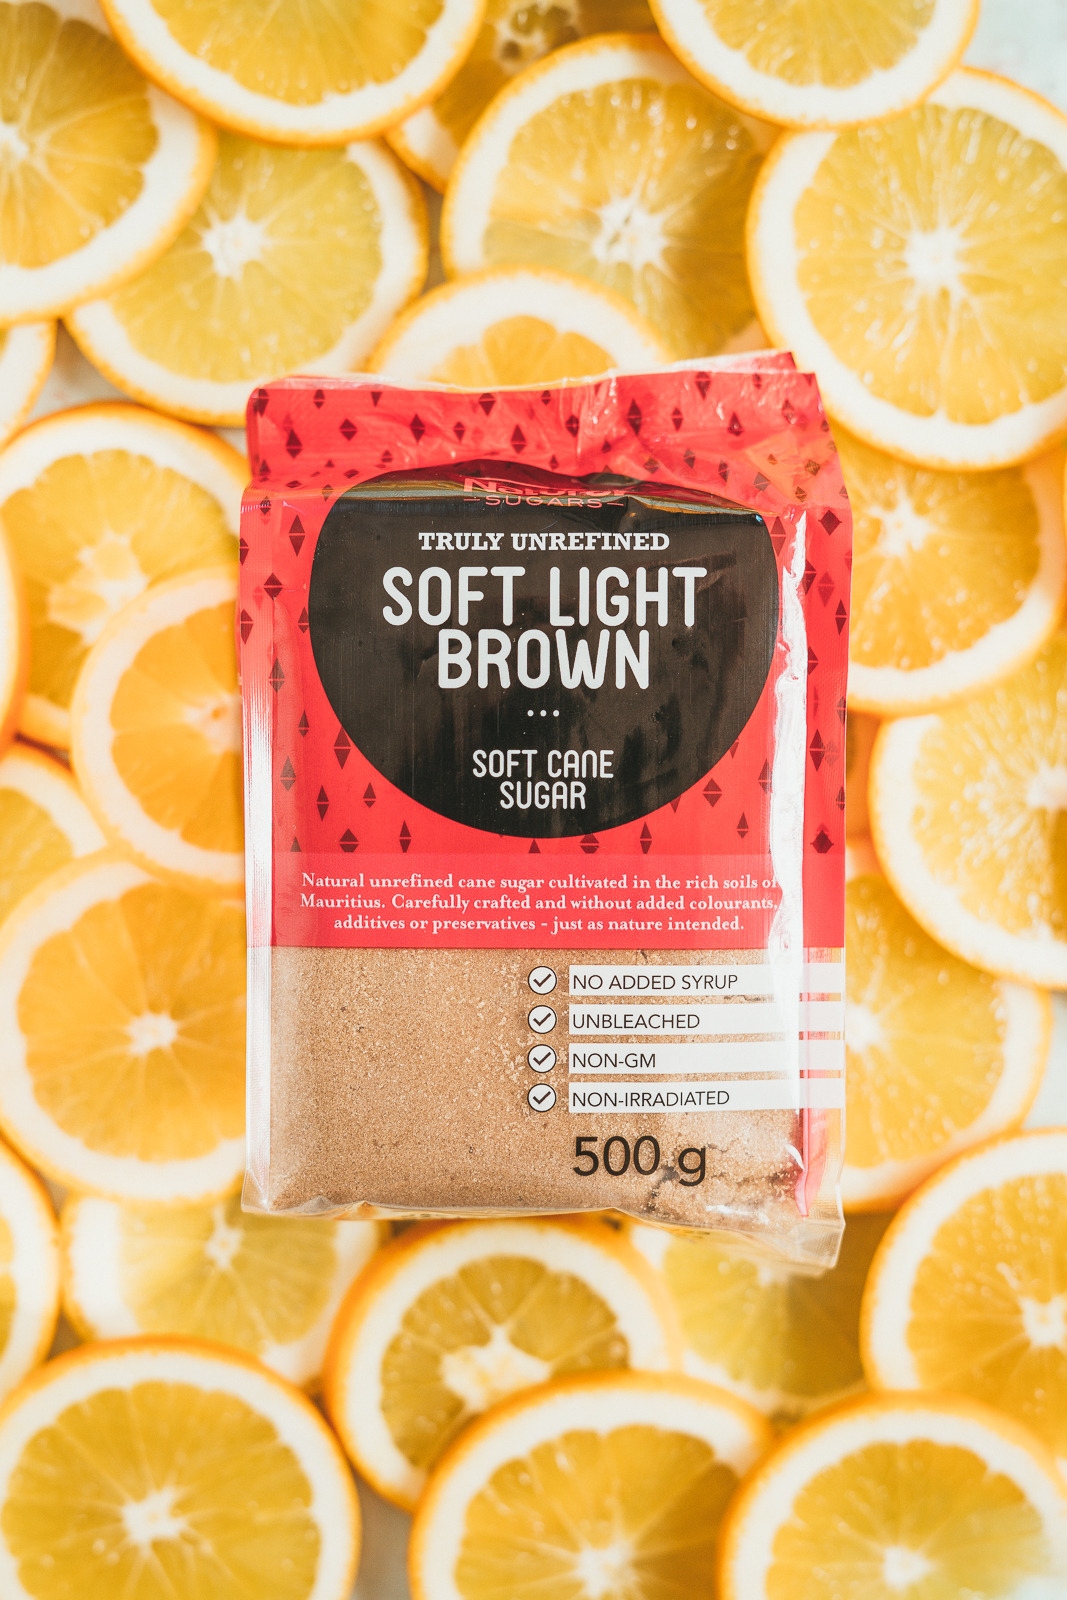
These two recipes are inspired by the beautiful unrefined Natura Sugars (Dark Demerara and Soft Brown Sugar) which have all the goodness and flavour locked into them – adding an extra layer of flavour to your baking! Although I don’t celebrate it, I do love Ramadan – the traditions around it, the sharing of family meals and how much effort goes into creating a delicious spread for your family. That’s something I can definitely get behind! Hopefully, these desserts will make it onto your Eid table, and if you’re not celebrating then they can become part of your weekend right now!
Coconut Orange Tres Leches Cake
2020-05-08 15:37:02
Serves 6
0 calories
0 g
0 g
0 g
0 g
0 g
0 g
0 g
0 g
0 g
0 g
Amount Per Serving
Calories 0
Calories from Fat 0
Trans Fat 0g
Polyunsaturated Fat 0g
Monounsaturated Fat 0g
Total Carbohydrates 0g
0%
Sugars 0g
Protein 0g
* Percent Daily Values are based on a 2,000 calorie diet. Your Daily Values may be higher or lower depending on your calorie needs.
- 1 orange
- 170g Natura Sugars Dark Demerara Sugar
- 170ml boiling water
- 156g cake flour, plus more for dusting pan
- 28g desiccated coconut
- 1 tsp baking powder
- 1 tsp salt
- 85g salted butter, room temperature, plus more
- 1 orange, zested
- 184g Natura Sugars Soft Brown Sugar
- 4 large eggs
- 85g coconut milk
- 85g sweetened condensed milk
- 56g heavy cream
- 1 cup whipping cream
- 80g mascarpone, room temperature
- To prepare the candied oranges, cut the orange into very thin slices using a mandolin or serrated knife. Set aside. In a small bowl, combine the Natura Sugars Dark Demerara Sugar and boiling water together and stir until the sugar has dissolved. Pour the syrup into a shallow heat-proof container and immerse the orange slices in the syrup. Refrigerate overnight.
- Preheat the oven to 90°C (70°C fan-forced). Line a large oven tray with baking paper and evenly arrange the soaked orange slices on to the lined baking tray. Bake for 20 minutes before flipping each slice over and baking for another 15 minutes. Remove from the oven and place on a cooling rack. Once cooled, store in an airtight container until needed.
- Preheat the oven to 180°C (170°C fan-forced). Grease and line a 20cm round or square baking tin.
- Add the cake flour, coconut, baking powder and salt to a small bowl and whisk together.
- In the bowl of a stand mixer fitted with the paddle attachment, or using a hand mixer, cream the butter until light and fluffy, about 1 minute. Set aside
- In a medium bowl, rub the orange zest and Natura Sugars Soft Brown Sugar together with your fingertips. Add the sugar to the butter mixture and cream together for a further 5 minutes, scraping down the sides as needed. Add the eggs in, one at a time, mixing thoroughly between each addition. Add vanilla extract and mix. Add in the flour mixture and mix until just combined. Pour the batter into the prepared baking tin and tap to smooth out the surface.
- Place in the oven and bake for 35 minutes or until lightly golden and cooked through. Take out of the oven, and set on a cooling rack to cool completely.
- In a small bowl or measuring jug, whisk together the coconut milk, condensed milk and cream.
- Poke holes all over the surface of the cake using a skewer or fork. Using a pastry brush, brush the coconut milk mixture over the surface of the cake until all the mixture is used up. Refrigerate for at least 30 minutes or overnight.
- To make the whipped cream mixture, place the whipping cream in the bowl of a stand mixer. Whip on high until soft peaks. Add the vanilla and mascarpone and fold through until smooth. If lumpy, use a whisk and beat until smooth.
- Spread the mixture over the cake, top with the orange slices and serve.
The Kate Tin https://thekatetin.com/

Chai Gulab Jamun
2020-05-08 15:32:02
Yields 10
0 calories
0 g
0 g
0 g
0 g
0 g
0 g
0 g
0 g
0 g
0 g
Amount Per Serving
Calories 0
Calories from Fat 0
Trans Fat 0g
Polyunsaturated Fat 0g
Monounsaturated Fat 0g
Total Carbohydrates 0g
0%
Sugars 0g
Protein 0g
* Percent Daily Values are based on a 2,000 calorie diet. Your Daily Values may be higher or lower depending on your calorie needs.
- 4 tbsp cake flour
- 3 tbsp fine semolina
- 500ml milk powder
- 1 tsp ground cardamom
- 1 tsp baking powder
- 45ml milk, plus extra if needed
- 2 tbsp ghee, melted
- Sunflower oil, for frying
- 1kg Natura Sugars Golden Light Brown Sugar
- 3 chai tea bags
- 4 tbsp desiccated coconut, toasted, for rolling
- Sift the flour, semolina, milk powder, cardamom and baking powder into a bowl.
- Add the ghee into the flour mixture and stir in the milk, incorporating to form a smooth dough. The dough needs to be slightly sticky but rollable.
- Cover with a cloth and rest for 10 minutes.
- With wet hands, roll the dough into 12-15 small walnut-sized balls.
- Heat the oil to 165°C. Deep-fry the balls, a few at a time, until dark golden brown - about 3-5 minutes. Remove from the oil and drain on paper towel
- To make the syrup, place the sugar and tea bags in a pot, add 650ml water and bring to the boil. Simmer for 5 minutes then add the fried gulab jamun so they absorb the syrup.
- Roll the gulab jamun in the toasted coconut and serve.
The Kate Tin https://thekatetin.com/


by Cassie | May 13, 2020 |
The East meets West combo you never knew you needed… until now.
Even though this Baklava Cheesecake looks like an absolute mission to make, I promise it’s not as tough as it looks and it’s definitely well worth the effort!

If you’re looking for delicious white chocolate to use in this recipe, go check out my online store!
Baklava Cheesecake
2020-05-11 12:09:28
Serves 8
0 calories
0 g
0 g
0 g
0 g
0 g
0 g
0 g
0 g
0 g
0 g
Amount Per Serving
Calories 0
Calories from Fat 0
Trans Fat 0g
Polyunsaturated Fat 0g
Monounsaturated Fat 0g
Total Carbohydrates 0g
0%
Sugars 0g
Protein 0g
* Percent Daily Values are based on a 2,000 calorie diet. Your Daily Values may be higher or lower depending on your calorie needs.
- 12 sheets phyllo dough
- 180g salted butter, divided and melted
- 200g pecan nuts
- 200g walnuts
- 400g (400 ml) full-fat cream cheese, at room temperature
- 150g (150 ml) crème fraîche or sour cream, at room temperature
- 90g (108 ml) castor sugar
- 20g (35 ml) cake flour
- 2 large eggs, at room temperature
- 100g white chocolate
- pinch of ground cardamom
- zest of 1 lemon
- 1 cup honey
- 1/2 cup water
- 1 teaspoon orange blossom water
- Zest and juice of 2 lemons
- Preheat the oven to 140 degrees celsius, gas mark 2.
- Grease a 22cm springform cake tin.
- Prepare the crust: Brush a phyllo dough sheet with butter and fold in half. Carefully place into the lined springform. Repeat until the pan is completely covered with phyllo dough and 8 tablespoons of butter are used. In the bowl of a food processor fitted with the blade attachment, grind pecan nuts and walnuts to a coarse, sand-like texture. Pour in remaining melted butter and salt and mix to combine. Press ¾ of the mixture into the bottom of the phyllo-lined pan (save the remaining mixture for the topping). Place on a baking tray and bake in the preheated oven for 10-15 minutes or until golden and crispy. Set aside to cool.
- Make the cheesecake: place the cream cheese, crème fraîche, sugar, flour, eggs, chocolate, cardamom and lemon zest together in a food processor and process until smooth. Pour into the prepared crust.
- Place in the preheated oven and bake for 20-25 minutes or until just set – it should have a slight wobble in the middle. Turn off the oven, leave the oven door ajar and allow to cool completely. Refrigerate until set.
- Make the topping: In a small saucepan, combine honey, water and orange blossom water and heat on medium-high. Bring to a boil and reduce to a simmer for approximately 15 minutes until thick. Remove from heat until cool, approximately 40 minutes. Stir in the remaining nut mixture (set aside from the base) and set aside until the cheesecake is ready.
- Assemble the cheesecake: Once the cheesecake has set and cooled, remove springform pan to reveal the baklava crust. Top with walnut topping and serve.
The Kate Tin https://thekatetin.com/

by Kate | Oct 10, 2019 |
A dense chocolate pear and almond cake layered with rich chocolate buttercream, pear gel and covered with brightly coloured pear chips
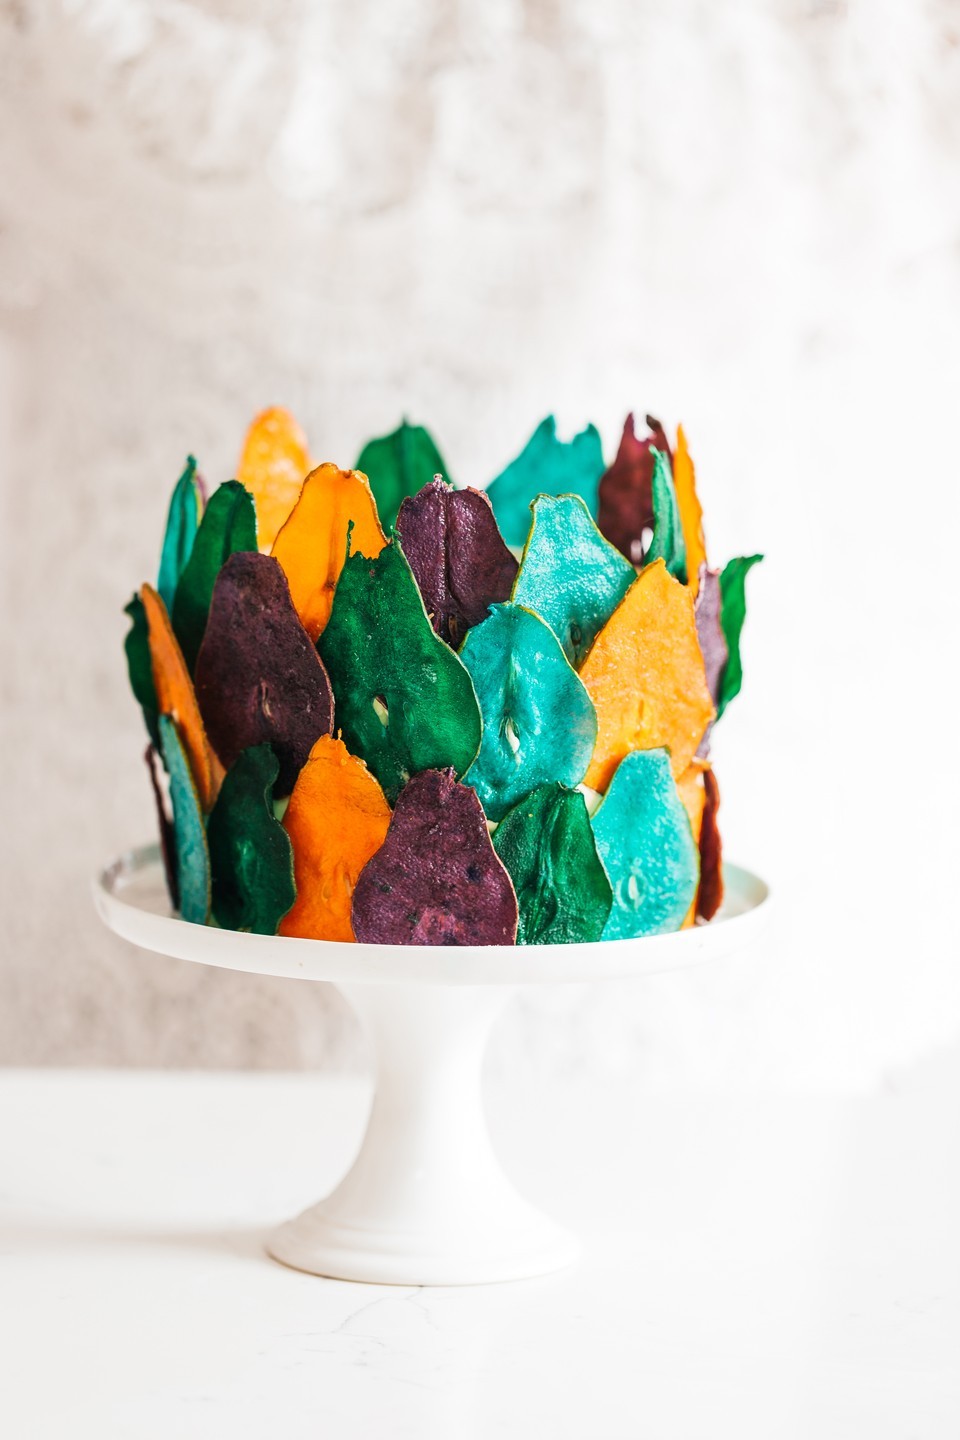
I’m not going to lie to you, this chocolate pear cake is a true labour of love. Apart from the chocolate almond sponge, chocolate ganache and pear gel, there’s a cream cheese frosting and the dyed pear chips to be made! But I know, just like me, you are always up for a challenge – especially if it tastes as good as it looks!
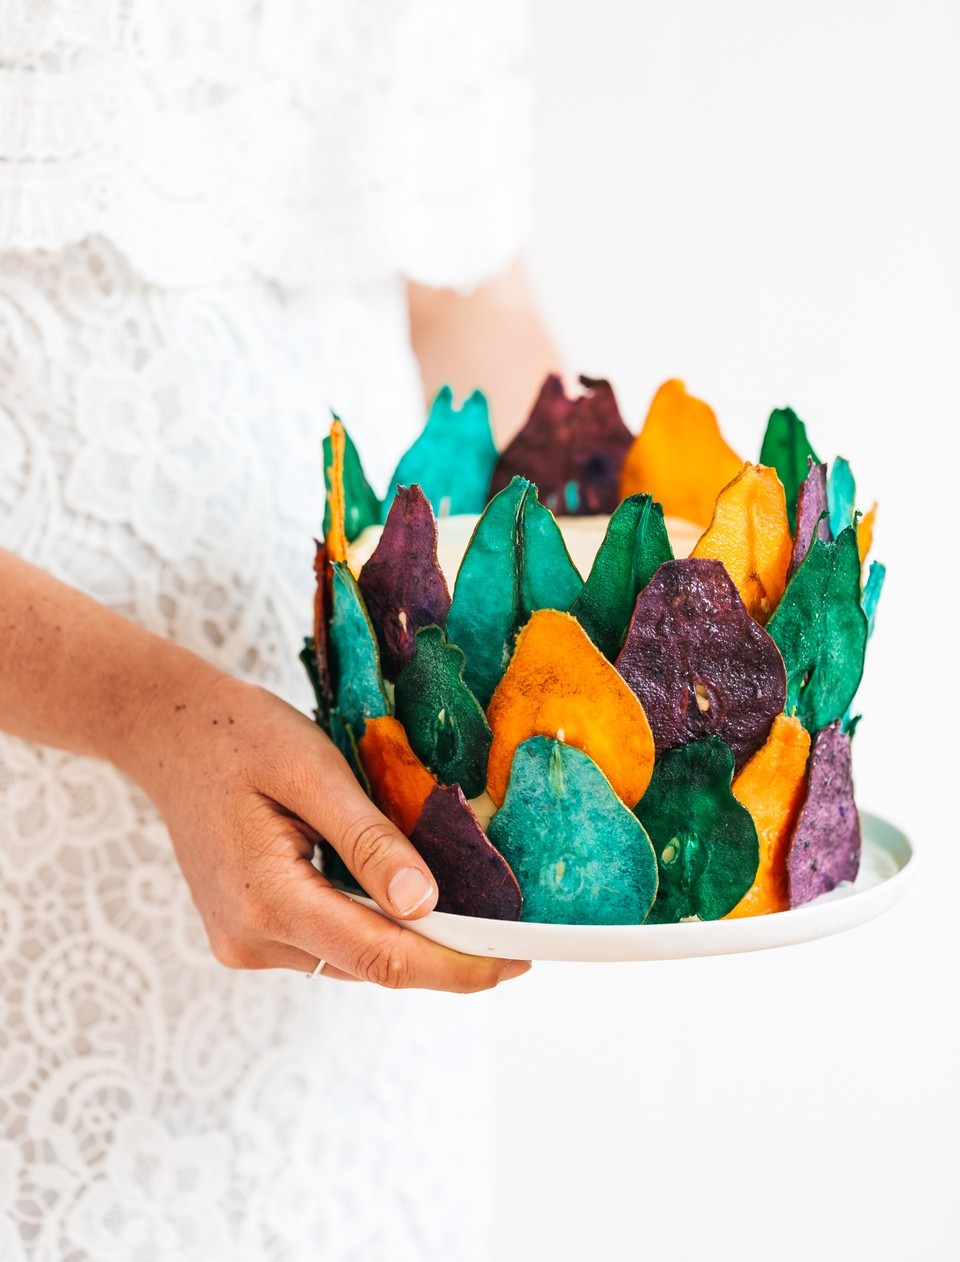
I was asked to create this showstopping chocolate pear cake for Food & Home Entertaining Magazine inspired by the beautiful cakes of Russian baker extraordinaire Tortik Annuchka who earlier this year became insta-famous for the beautiful towering cakes adorned with wafer-thin, ombre-died pear chips.
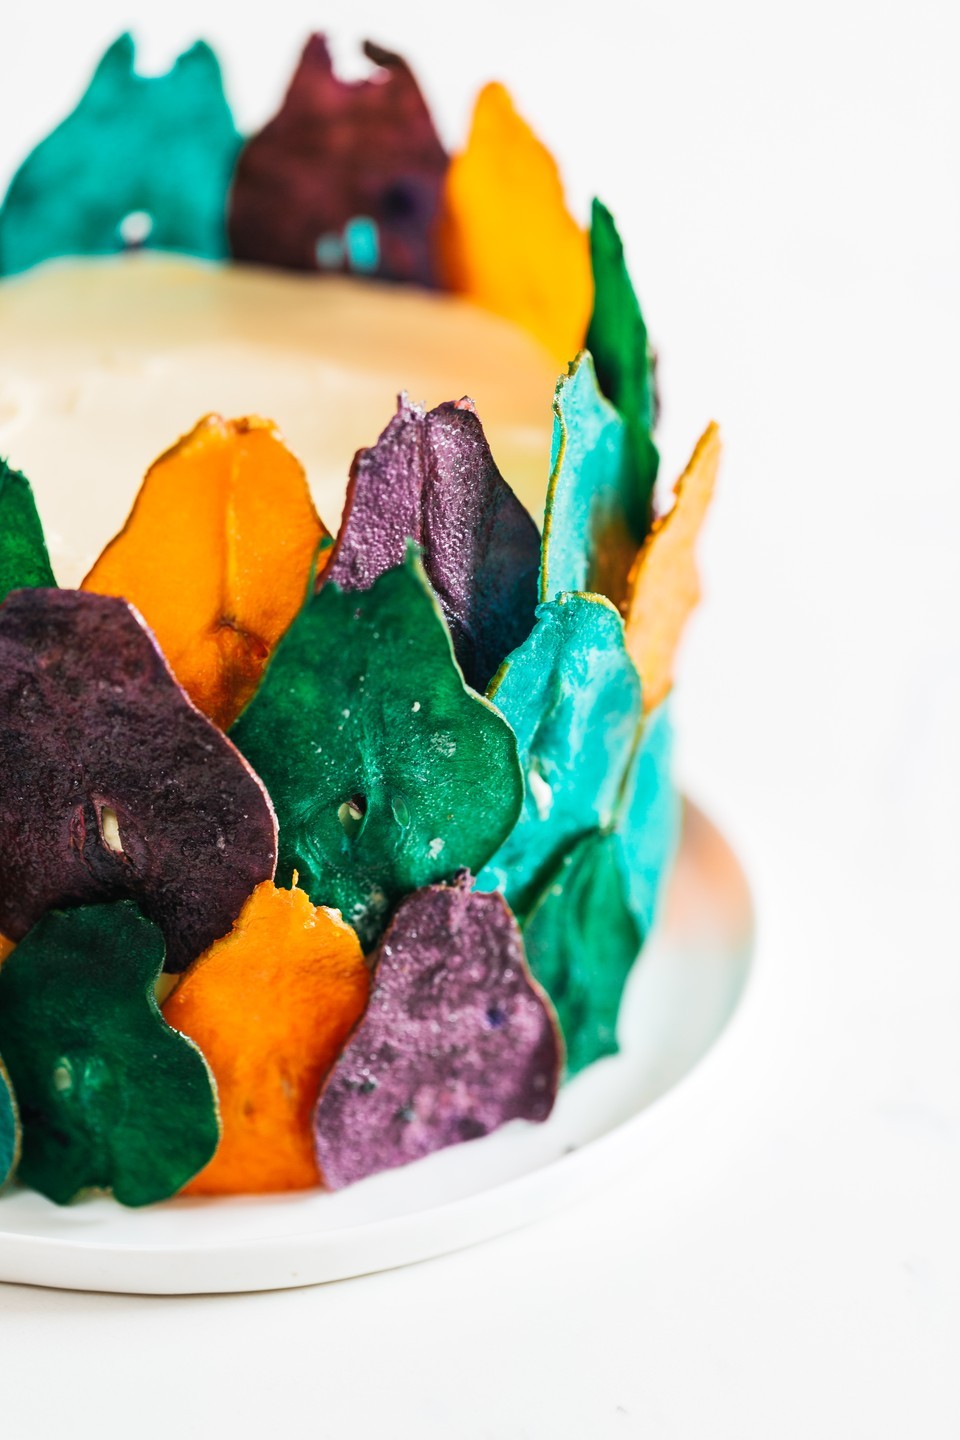
The cake itself is a super moist, slightly dense chocolate cake with a slight almond crunch. I used really good chocolate for the ganache (because it’s such a dominant flavour, you really don’t want to go cheap on it!) and my secret to cutting the sweetness and adding loads of peary (is that a word?!) flavour is to make a pear gel. Making a gel sounds way more complicated than it really is: simply boil fruit of your choice with sugar and agar agar, let it set then blitz it up using a hand blender and voila!
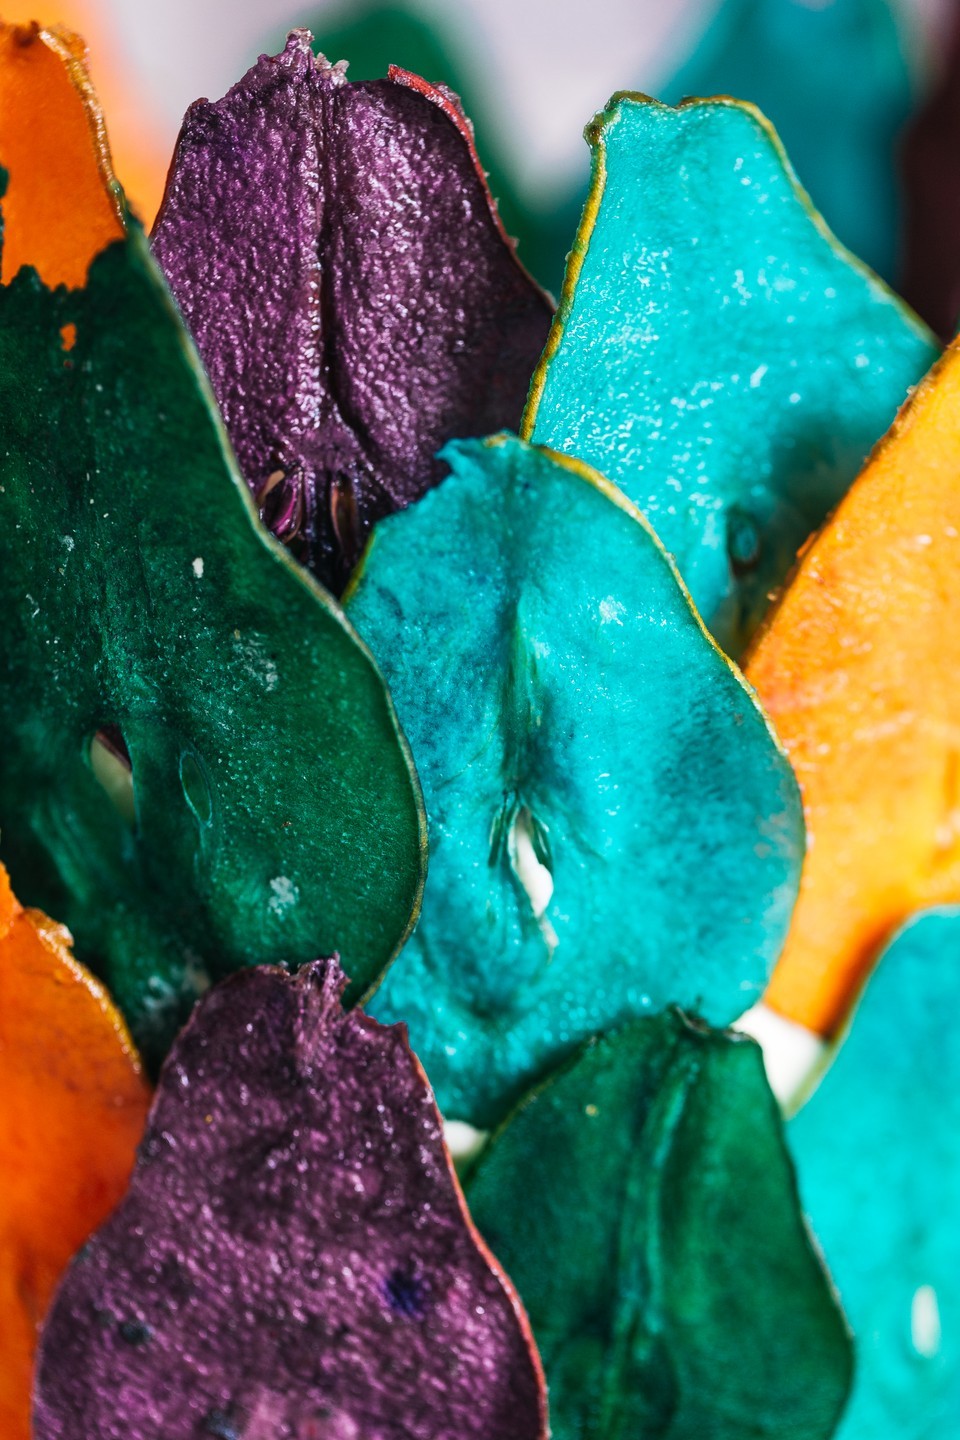
The beauty of the pear chips is that you can dye them whatever colour you like – keeping the same colour and dying them different shades would work beautifully too! And, if you’re not a great cake decorator, you can hide your less-than-perfect frosting and nobody will ever know! What’s your favourite cake trend at the moment? Let me know below!
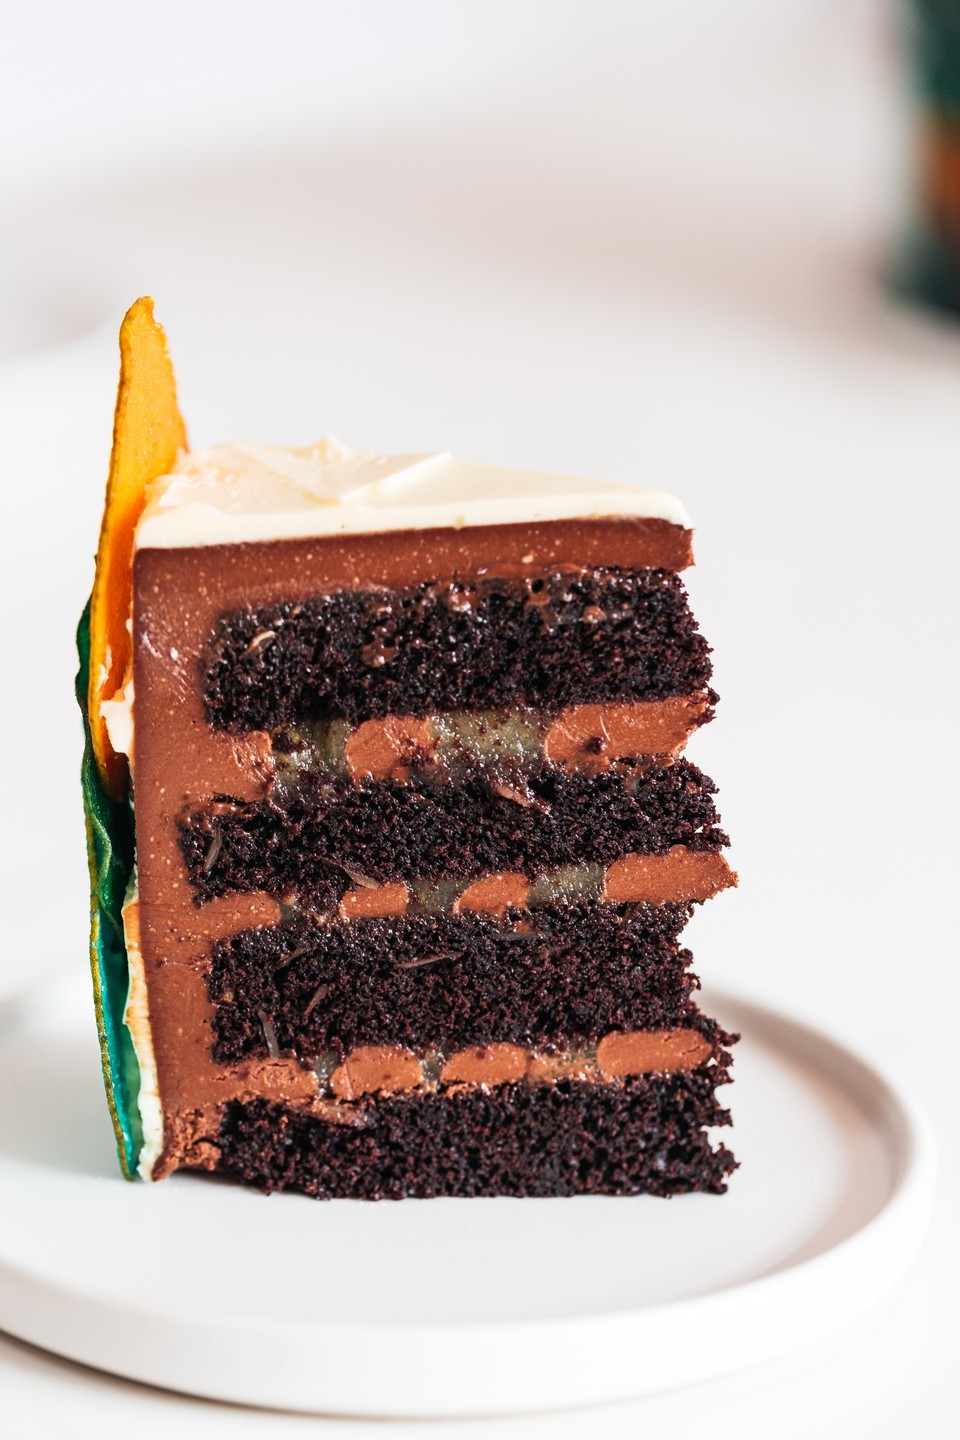
Chocolate Pear and Almond Cake with Pear Chips
2019-10-08 14:35:23
Serves 8
0 calories
0 g
0 g
0 g
0 g
0 g
0 g
0 g
0 g
0 g
0 g
Amount Per Serving
Calories 0
Calories from Fat 0
Trans Fat 0g
Polyunsaturated Fat 0g
Monounsaturated Fat 0g
Total Carbohydrates 0g
0%
Sugars 0g
Protein 0g
* Percent Daily Values are based on a 2,000 calorie diet. Your Daily Values may be higher or lower depending on your calorie needs.
- CAKE
- 200g cake flour
- 300g castor sugar
- 60g The Kate Tin Cocoa Powder
- 1 tsp bicarbonate of soda
- 120g salted butter, chopped
- 125ml (½ cup) freshly brewed coffee
- 125ml (½ cup) full-cream milk
- ½ tsp almond extract/1 tbsp almond-flavoured liqueur
- 2 large eggs
- 50g flaked almonds, lightly toasted
- DYED PEAR CHIPS
- 6 large pears
- a squeeze lemon juice
- 115g white sugar
- 250ml (1 cup) water
- gel food colouring of your choice (we used green, orange, turquoise and purple)
- CHOCOLATE-GANACHE ICING
- 350g The Kate Tin Dark Baking Chocolate, finely chopped
- 430ml fresh cream
- 125ml (½ cup) sour cream
- ½ tsp almond extract/1 tbsp almond-flavoured liqueur
- PEAR GEL
- 250ml (1 cup) pear juice
- 50g white sugar
- 50ml water
- 1 tsp agar agar
- CREAM-CHEESE ICING
- 200g icing sugar
- 75g unsalted butter, at room temperature
- 100g full-fat cream cheese
- Preheat the oven to 180°C. Grease and line 2 x 17cm cake tins with baking paper. Set aside until needed.
- For the cake, sift the cake flour, castor sugar, cocoa powder and bicarbonate of soda together in the bowl of a stand mixer fitted with a paddle attachment. Add the salted butter and beat on low speed until the mixture resembles fine breadcrumbs. Set aside.
- In a separate bowl, mix the freshly brewed coffee, full-cream milk and almond extract/almond-flavoured liqueur together. Add the liquid to the butter-mixture, along with the eggs and flaked almonds. Beat on low speed until combined and smooth.
- Divide the batter between the prepared cake tins. Bake in the preheated oven until a skewer inserted into the centre of the cakes comes out clean, about 30 minutes. Remove from oven and set aside to cool slightly before turning the cakes out on a wire cooling rack to cool completely. Use a serrated bread knife to cut a very thin slice off the top of each cake to create a flat surface. Cut each cake in half so as to create 4 individual cake layers. Set aside.
- For the dyed pear chips, line 2 – 3 baking sheets with baking paper. Set aside until needed. Preheat the oven to 80°C.
- Cut the pears into 0,5cm-thick slices using a mandolin slicer/sharp knife. Place the slices in a bowl of water. Add a squeeze of fresh lemon juice. Set aside until needed.
- Make a sugar syrup by bringing the 115g white sugar and 250ml (1 cup) water to a boil in a small saucepan placed over medium heat, stirring continuously until the sugar has dissolved. Remove from heat and divide the syrup among 4 small pots. Tint each ¼ with one of the gel food colourings of your choice.
- Divide the pear slices among the pots of coloured sugar syrup. Place the pots over medium heat and bring to a boil. Reduce the heat to low and simmer until the pear slices turn translucent, about 3 – 5 minutes. Using a slotted spoon, remove the slices from the pots and place on paper towel to absorb excess liquid. Arrange the slices on the prepared baking sheets. Bake in the preheated oven until dried yet still flexible, about 2 hours
- For the chocolate-ganache icing, place the finely chopped chocolate in a large heatproof bowl. Set aside until needed. Heat the fresh cream, sour cream and almond extract/almond-flavoured liqueur in a small pot over medium heat until just boiling. Pour the warm liquid over the chocolate and set aside to melt, about 5 minutes. Stir until smooth. Set aside to cool to room temperature. Once the icing starts to thicken, whisk it slightly until the mixture reaches a spreadable consistency. Be mindful not to whisk the icing too much, as it will split. Transfer to a piping bag fitted with a round nozzle. Set aside until needed.
- For the pear gel, place the pear juice in a small saucepan and bring to a gentle boil over medium-high heat. Continue to boil until ½ the juice has evaporated, about 10 minutes. Add the 50g white sugar, 50ml water and agar agar, and bring to a boil. Continue to boil until the agar agar has dissolved, about 3 minutes. Remove from heat and pour the mixture into a standard sized loaf tin. There is no need to grease or line the tin. Refrigerate until set. Once set, break the block into manageable chunks and place in a blender. Blitz until smooth. Transfer the gel to a piping bag fitted with a round nozzle. Set aside until needed.
- For the cream-cheese icing, place the icing sugar and unsalted butter in the bowl of a hand held/stand mixer. Beat until light and fluffy. Add the cream cheese and mix until just incorporated.
- To assemble, place a cake layer on a cake stand. Pipe alternating rings of chocolate-ganache icing and pear gel onto the cake. Place a second cake layer on top and repeat with piping alternating rings of chocolate-ganache icing and pear gel. Repeat once more, ending with the fourth cake layer on top. Refrigerate until set, about 30 minutes.
- Spread the cream-cheese icing over the outside of the cake. Next, layer the dried pear chips onto the layer of icing. Starting from the top, arrange the slices in alternating colours, overlapping the pears slightly to create a stained glasses effect. Use any leftover icing to secure the slices in place, if needed. Before applying the final layer, use a sharp knife to level off the bottoms of the selected pair chips before adhering them to the cake. This will make for a neat finish. Serve immediately.
By TheKateTin.com
The Kate Tin https://thekatetin.com/

by Kate | Aug 23, 2019 |
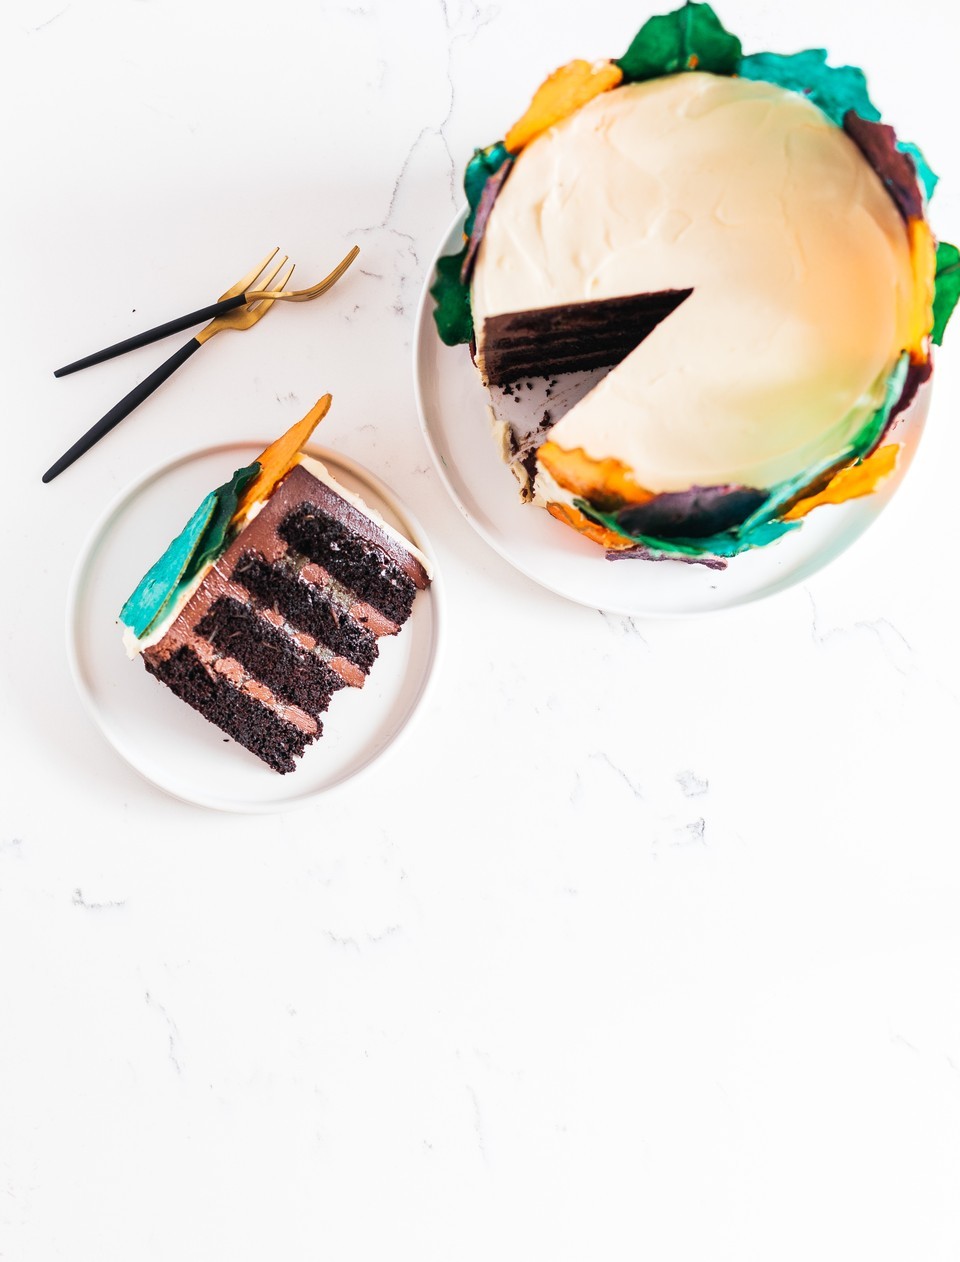
Spicy, rich and moist, this loaf cake has a deep molasses flavour, flecks of seasonal pears and a crunchy oat topping that makes it perfect for tea time!
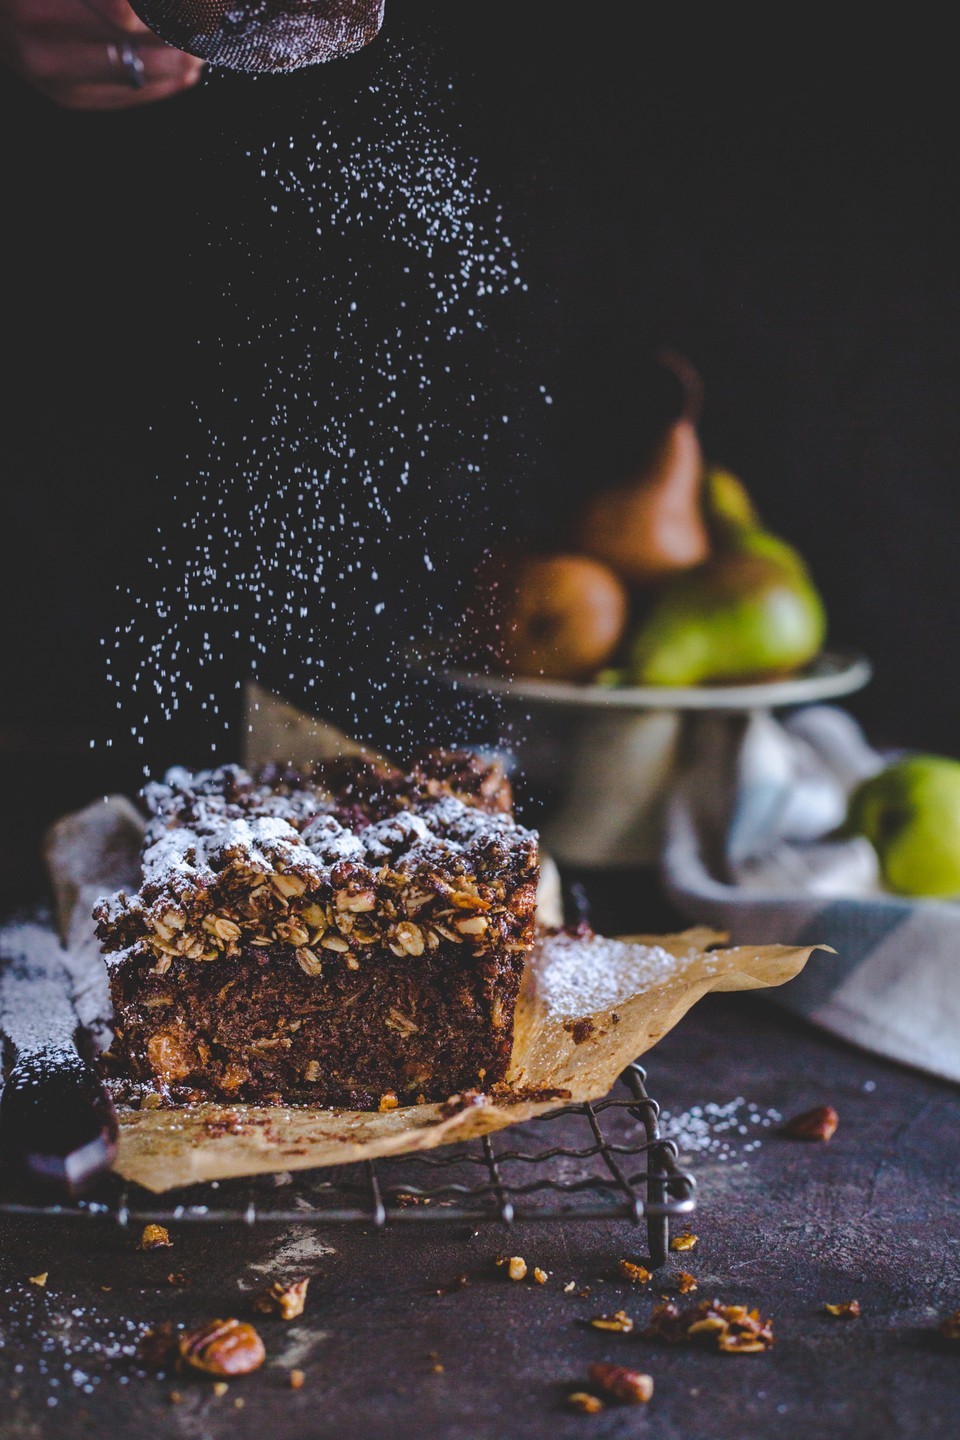
We’ve almost made it through another winter, and if, like me, you’ve only just woken up and realised you didn’t bake all the wintery things you should’ve, then time to get cracking! This molasses loaf cake may not look like as pretty as a layer cake but man is it tasty! It’s got just enough fruit and fibre to make you feel okay for devouring another slice and google says molasses is good for you, so there’s that going for it too. Don’t skip the molasses but do swop out the pear if it’s not your thang – apples or dried fruit would work just as wonderfully. And if you’d prefer something prettier, check out this baby!
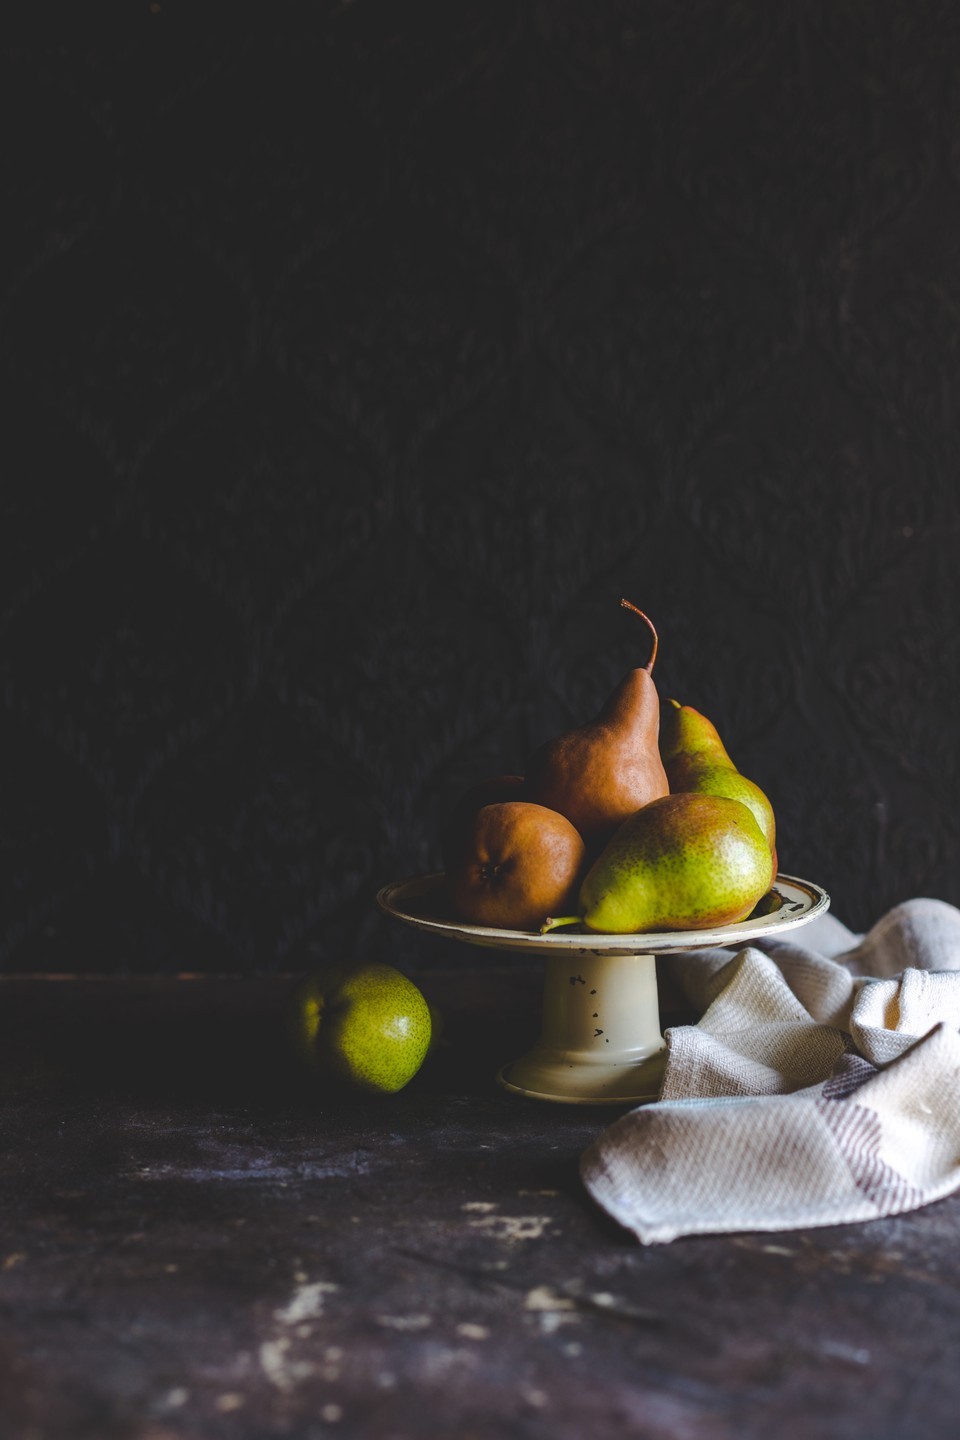
Spiced Pear Molasses Loaf Cake with Oat Crumble
2019-08-22 11:57:11
Yields 1
A rich, moist loaf cake with a deep molasses flavour and a crunchy topping.
0 calories
0 g
0 g
0 g
0 g
0 g
0 g
0 g
0 g
0 g
0 g
Amount Per Serving
Calories 0
Calories from Fat 0
Trans Fat 0g
Polyunsaturated Fat 0g
Monounsaturated Fat 0g
Total Carbohydrates 0g
0%
Sugars 0g
Protein 0g
* Percent Daily Values are based on a 2,000 calorie diet. Your Daily Values may be higher or lower depending on your calorie needs.
- 110g salted butter or margarine, softened
- 100g Natura Sugars soft brown sugar
- 35g molasses
- 2 large eggs, at room temperature
- 90ml buttermilk
- 1 tsp vanilla extract
- 100g self-raising flour, sifted
- ¼ tsp bicarbonate of soda
- ½ tbsp ground cinnamon
- ¼ tsp nutmeg
- 60g finely grated pear (approximately 1 small pear), squeezed well
- ¼ cup sultanas (optional)
- 35g flaked almonds, toasted
- OAT CRUMBLE
- 80g Natura Soft Brown Sugar
- 25g molasses
- 50g old-fashioned oats (not instant)
- 60g salted butter or margarine, at room temperature
- 90g (3/4 cup) pecan nuts, chopped
- Preheat the oven to 180 degrees celcius (160 fan-forced) and grease and line a standard loaf tin. Cream the butter and sugar until very light and fluffy – about 8 minutes.
- Add the molasses.
- Add the eggs one at a time, beating well in between each addition.
- Beat in the buttermilk and vanilla.
- Combine the self-raising flour, bicarbonate of soda and spices and stir into the cake batter.
- Stir in the grated pear, sultanas and flaked almonds then spread into the prepared tin and bake for about 40 minutes.
- Meanwhile, combine the sugar, molasses, oats, butter and pecan nuts together to form a crumble. 25 minutes into the baking time, sprinkle over the crumble topping then continue baking for another 15 minutes or until a skewer comes out clean.
- Cool the cake slightly in the loaf tin before turning out and allowing to cool completely.
By TheKateTin.com
The Kate Tin https://thekatetin.com/
Recipe originally created for Food & Home Entertaining Magazine

by Kate | Jul 10, 2019 |
This spin on a peppermint crisp tart has layers of mini chocolate swiss rolls holding a filling of caramel mousse, flecks of peppermint crisp and chocolate coconut ganache.
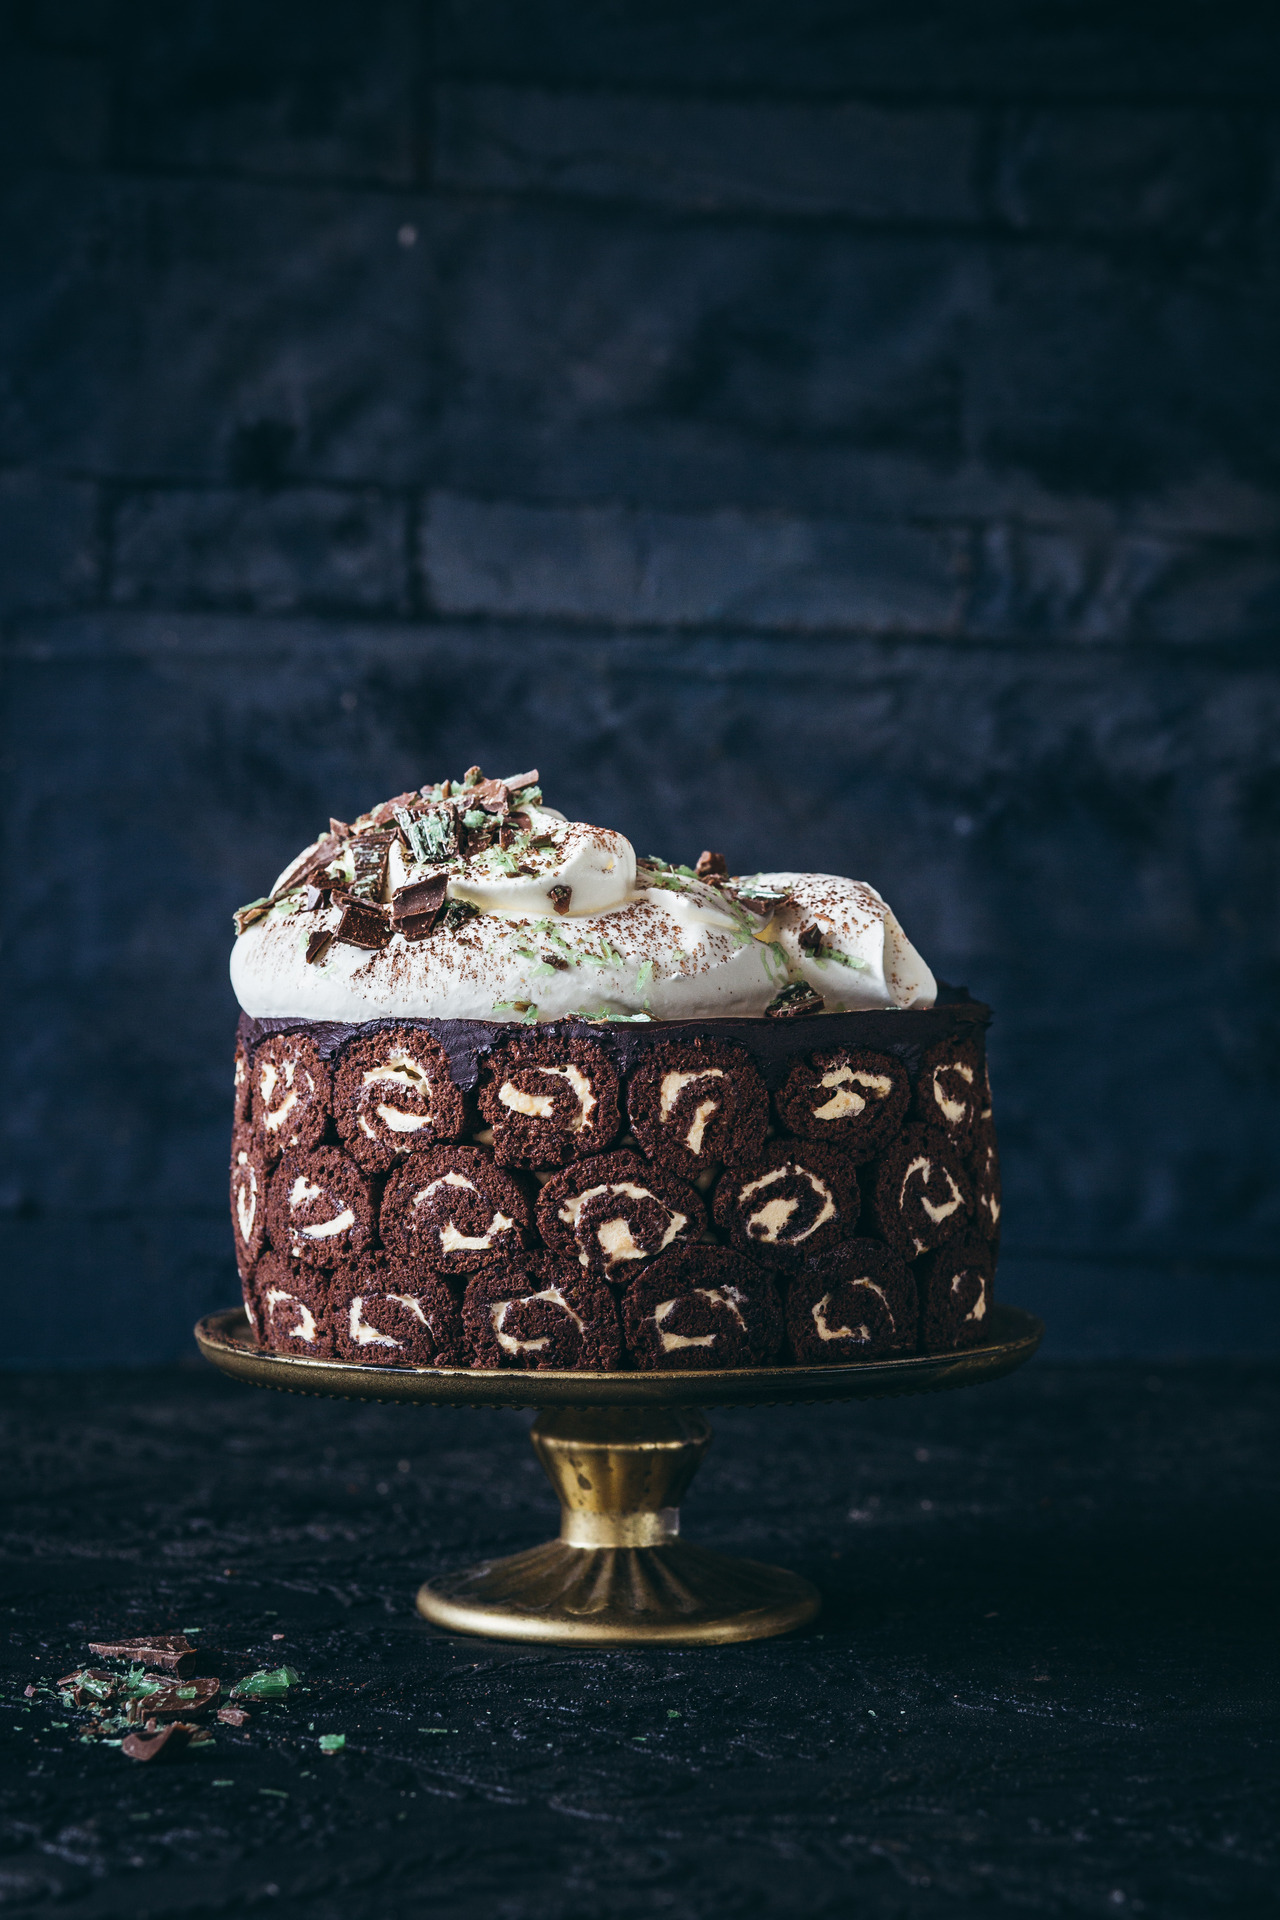
Another peppermint crisp creation for the (recipe) books! This beauty was created by Landi from The Tocka Blog. Landi won the first round of the Stork Bake competition with her gorgeous peppermint crisp baked Alaska. For the next round, we were teamed up as I mentored her through to the final round where we went up against Lentswe Bhengu and The Lazy Makoti… and WE WON! It’s not surprising really, considering 1) how awesome you all were to support us and vote for her and 2) how drop-dead delicious this recipe is!
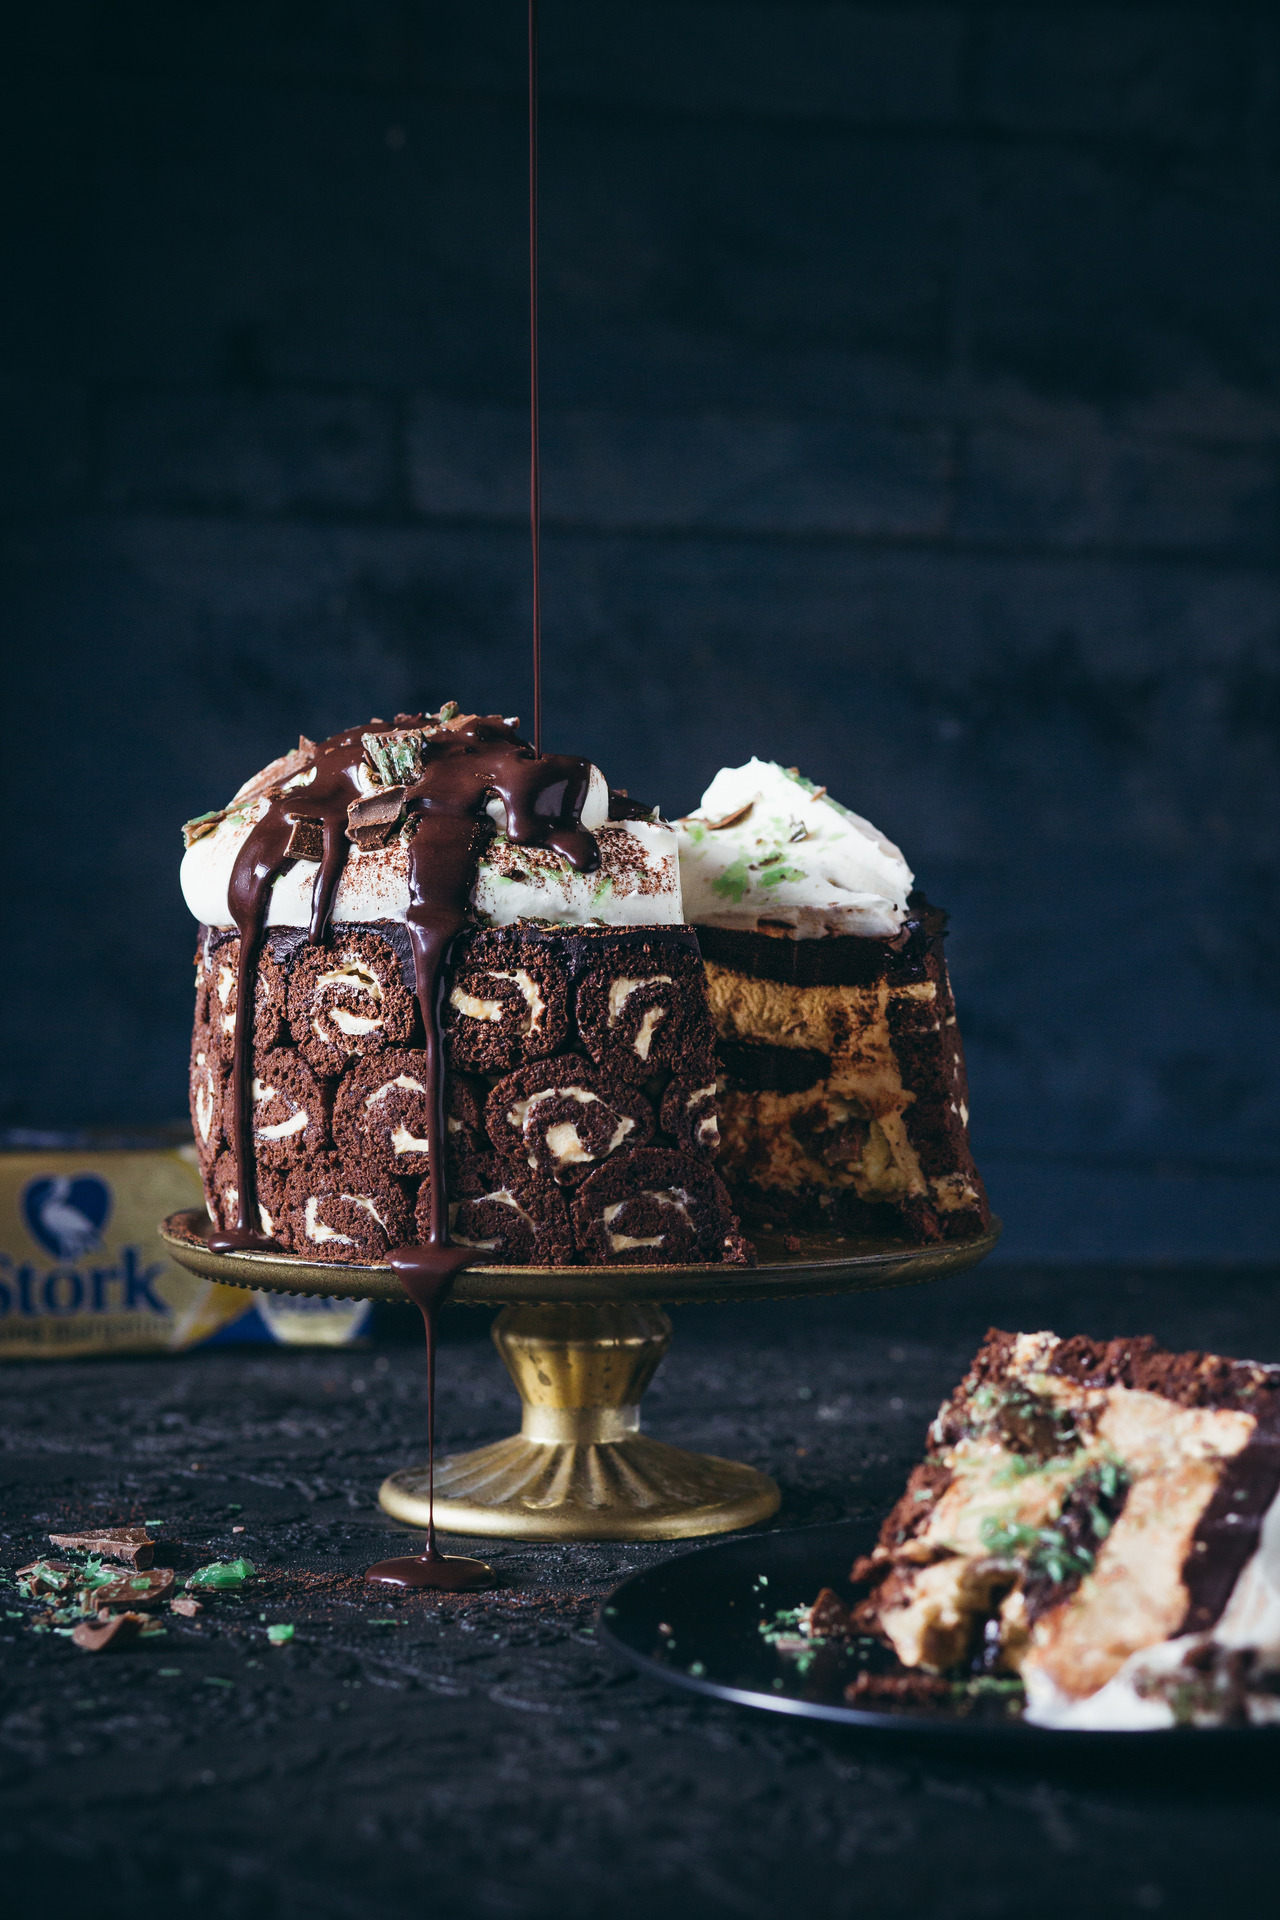
In case the picture doesn’t already have you rushing to your kitchen, those mini swiss rolls are holding a delicious caramel mousse together which is layered with shards of peppermint crisp and swirls of chocolate coconut ganache. This is THE showstopper your next dinner party/braai/book club/Friday night alone needs!
Chocolate Peppermint Crisp Charlotte
2019-07-10 09:51:26
Serves 8
0 calories
0 g
0 g
0 g
0 g
0 g
0 g
0 g
0 g
0 g
0 g
Amount Per Serving
Calories 0
Calories from Fat 0
Trans Fat 0g
Polyunsaturated Fat 0g
Monounsaturated Fat 0g
Total Carbohydrates 0g
0%
Sugars 0g
Protein 0g
* Percent Daily Values are based on a 2,000 calorie diet. Your Daily Values may be higher or lower depending on your calorie needs.
- Chocolate Swiss roll
- 3/4 cup cake flour
- 1/4 cup The Kate Tin Cocoa Powder
- 5 eggs, separated
- 50g Stork Bake, melted
- 3/4 cup castor sugar
- Caramel mousse
- 2 tsp powdered gelatine
- 3 tbsp water
- 1 x 400g tin of caramel treat
- 1 teaspoon vanilla extract
- 500ml whipping cream
- pinch of salt
- Dark chocolate coconut ganache
- 200 ml coconut milk
- 50 g The Kate Tin Dark Baking Chocolate, chopped
- 120 g The Kate Tin Cocoa Powder
- 50 g brown sugar
- 400g peppermint crisp, crushed, for sprinkling
- Extra whipped cream, for topping
- Pre-heat oven to 200°c. Line two baking sheets with baking paper. On the back of the first parchment paper, trace two 20cm circles and on the back of the second parchment paper, draw two long wide strips. Lightly dust the parchment paper with icing sugar to prevent the cookies from sticking.
- In a bowl, combine the flour and cocoa powder. Set aside.
- In another bowl, beat the egg whites with an electric mixer until soft peaks form. Gradually add 125 ml of sugar and beat until stiff peaks form. Set aside.
- In another bowl, beat the egg yolks and the remaining sugar with the electric mixer, add in the cooled melted Stork Bake. Using a spatula, gently fold in the meringue and the dry ingredients.
- Spread the mixture evenly on the baking sheets being careful not to overwork the mixture. Bake one sheet at a time for 8 to 10 minutes or until springy to the touch. Turn out onto a damp, clean dishcloth, cut the sheet of cake lengthwise to form two long strips. Roll each strip up tightly to form two long mini swiss rolls. Allow to cool completely.
- To make the mousse, sprinkle the gelatine over the water and allow to bloom. Microwave in 30-second intervals until melted and mix into a mixing bowl with the tinned caramel, add the vanilla and salt. Lastly fold in the cream until the caramel and cream are combined.
- To make the ganache, in a saucepan pour in the coconut milk, sugar and cocoa powder in a saucepan and stir over a low heat until the sugar is dissolved. Remove from heat and add the chopped chocolate and whisk until smooth, set aside to cool.
- To assemble, carefully unroll the swiss rolls and spread a thin layer of caramel mousse over the sponge. Roll up again then use sharp knife to cut into 1cm wheels. Using a 20 cm spring form cake tin, place the mini swiss rolls around the edge of the tin and on the bottom. Pipe a layer using half of the caramel mousse, refrigerate to set, layer with dark chocolate coconut ganache and peppermint crisp chocolate and cover with remaining caramel mousse. Add second sponge layer, top with whipped cream and chopped up peppermint crisp.
By TheKateTin.com
The Kate Tin https://thekatetin.com/

by Kate | Apr 23, 2019 |
Madeleines may look fancy and intricate, but making these perfect little French cakes – complete with their trademark bumps – is a lot easier than baking a large cake!
SPONSORED

I’ve partnered with my favourite Natura Sugars to create a series of recipes that heroes the beauty of unrefined sugars. Unrefined sugar has all the beautiful molasses flavour locked into it (instead of refining it out) so if you’re a baker, it means that you can add another layer of flavour to your bakes simply by using really great quality sugar! And when I discovered I don’t have my madeleine recipe up on the blog, I knew that it was the perfect recipe.

This time, I’m putting their Dark Demerara Sugar on a pedestal and marvelling at the fudgy, caramelly flavour it imparts to anything it’s stirred into – including these dainty, light-as-air madeleines. While they may look fancy, madeleines are one of the easier French delicacies to make (compared to the macaron!).
The Perfect Madeleine
You can spot the perfect madeleine with its caramelised edges and the cute little hump it makes on one side. This hump (which I’m pretty sure was created as a mistake) is a quintessential characteristic of a proper madeleine and happens because the cake mixture is chilled and then put into a very hot oven. In any other bake, a hump would be considered a mistake, but here it is celebrated, even.

The best thing about madeleines is the fact that the mixture can be kept in the fridge for a day or two – you can simply bake a batch when the craving strikes! And just imagine the oooh’s and aaaah’s you’ll get if you serve a tray of freshly baked madeleines for dessert at your next dinner party! Even better, serve them with this crazy delicious salted caramel sauce!

Brown Sugar Madeleines
2019-04-03 15:41:12
Yields 24
A light and airy little cake that makes a very special end to the meal.
0 calories
0 g
0 g
0 g
0 g
0 g
0 g
0 g
0 g
0 g
0 g
Amount Per Serving
Calories 0
Calories from Fat 0
Trans Fat 0g
Polyunsaturated Fat 0g
Monounsaturated Fat 0g
Total Carbohydrates 0g
0%
Sugars 0g
Protein 0g
* Percent Daily Values are based on a 2,000 calorie diet. Your Daily Values may be higher or lower depending on your calorie needs.
- 100g salted butter
- 5g honey
- 2 large eggs, at room temperature
- 65g Natura Sugars Soft Brown sugar
- 100g cake flour
- 4g baking powder
- 15g salted butter, melted
- 50g Natura Sugars Demerara Sugar, for sprinkling
- Melt the butter and honey and set aside.
- In a bowl, beat the eggs and soft brown sugar until very pale and fluffy (ribbon stage). The mixture should leave a trail when you draw a figure 8 in the bowl).
- Add the melted butter and honey and mix quickly. Remove from the stand mixer.
- Finally sift in the flour and baking powder and fold gently to form a smooth batter.
- Place the madeleine mix in a piping bag and refrigerate for at least 2 hours - preferably overnight.
- Preheat the oven to 200 degrees Celsius (180 if you have a fan-forced oven).
- Generously brush the madeleine moulds with melted butter.
- Pipe the madeleine mixture into each mould - filling it 3/4 of the way, sprinkle with the demerara sugar and bake for 6-8 minutes.
- Serve warm sprinkled with more demerara sugar, if desired.
- The batter needs to be cold before it is baked in order for the madeleines to form the trademark bump.
- Madeleines are best served warm, straight from the oven.
- If you wish to flavour the madeleine batter, you can add spices, zest, extracts along with the flour.
By TheKateTin.com
The Kate Tin https://thekatetin.com/
