These Hot Cross Bundts are a fun spin on hot cross buns. They’re loaded with spice and fruit, topped with a glaze and served with a boozy rum and raisin sauce.
Hot Cross Bundts
2019-04-10 18:45:39
Serves 6
A spiced cake topped with a glaze and served with a rum 'n raisin sauce. Recipe originally created for Food & Home Entertaining Magazine
Print
Total Time
3 hr
Total Time
3 hr
0 calories
0 g
0 g
0 g
0 g
0 g
0 g
0 g
0 g
0 g
0 g
Nutrition Facts
Serving Size
0g
Servings
6
Amount Per Serving
Calories0
Calories from Fat 0
% Daily Value *
Total Fat 0g
0%
Saturated Fat 0g
0%
Trans Fat 0g
Polyunsaturated Fat 0g
Monounsaturated Fat 0g
Cholesterol 0mg
0%
Sodium 0mg
0%
Total Carbohydrates 0g
0%
Dietary Fiber 0g
0%
Sugars 0g
Protein 0g
Vitamin A
0%
Vitamin C
0%
Calcium
0%
Iron
0%
* Percent Daily Values are based on a 2,000 calorie diet. Your Daily Values may be higher or lower depending on your calorie needs.
A towering and decadent chocolate explosion cake layered with white chocolate buttercream that comes with chocolate balls filled with sprinkles, glitter and sweets so the birthday girl or boy can smash them all over their cake. Piñata-style !
As a kid, I always had a piñata at every birthday party. My dad had been to Mexico and fell in love with the tradition, so each year we would make a piñata out of newspaper and glue, stuff it with sweets and toys and then, blindfold on, my friends and I would take turns to whack it until it eventually exploded and rained exciting goodies all over the place. This memory was the inspiration behind the most spectacular birthday cake of all – chocolate balls filled with sprinkles and glitter that the birthday girl or boy can smash all over their own cake!
This towering, colourful explosion cake is made up of my favourite chocolate cake, sandwiched together with vibrantly tinted white chocolate buttercream. The chocolate balls can be filled with whatever sprinkles, sweets or surprises you like – whatever you fill them with they are going to be LOADS of fun! It’s one of the more advanced recipes in the book, but I know that many of you have been baking recipes from The Kate Tin for quite a few years now, and since you’ve had so much practice and really are incredibly good bakers now, I need to keep up with your skills and so I think this one is a nice challenge! I also don’t think I’m alone here when I say that, I don’t mind the effort if I’m baking for someone special!
This fun creation comes straight out of my cookbook, ‘Chocolate’ which is a collection of 90 brand new recipes that champion my favourite ingredient, chocolate, in some rather unique ways! I’ve shared a few recipes from the book here and here. If you haven’t already got a copy, you can order it online from Loot or Takealot or find it in any bookstore nationwide!
The reason for sharing the recipe for this celebratory chocolate explosion cake today is that it was exactly 9 years ago back in 2010 that I started The Kate Tin and published my very first post. I cannot quite believe that it has morphed into a brand, a couple of awards and a cookbook in just under a decade! If you’re a regular around here (which I know many of you are), I want to THANK YOU from the bottom of my heart, for clicking, liking, sharing and making my recipes and allowing me to inspire you with wickedly delicious bakes. Here’s to another 9 years!
Chocolate Explosion Cake
2019-02-15 18:13:19
Serves 8
Recipe extract from 'Chocolate' by Katelyn Williams published by Human & Rousseau
Print
Total Time
4 hr
Total Time
4 hr
0 calories
0 g
0 g
0 g
0 g
0 g
0 g
0 g
0 g
0 g
0 g
Nutrition Facts
Serving Size
0g
Servings
8
Amount Per Serving
Calories0
Calories from Fat 0
% Daily Value *
Total Fat 0g
0%
Saturated Fat 0g
0%
Trans Fat 0g
Polyunsaturated Fat 0g
Monounsaturated Fat 0g
Cholesterol 0mg
0%
Sodium 0mg
0%
Total Carbohydrates 0g
0%
Dietary Fiber 0g
0%
Sugars 0g
Protein 0g
Vitamin A
0%
Vitamin C
0%
Calcium
0%
Iron
0%
* Percent Daily Values are based on a 2,000 calorie diet. Your Daily Values may be higher or lower depending on your calorie needs.
125 g The Kate Tin White Baking Chocolate, finely chopped
10 ml (2 tsp) vegetable or canola oil
400 g unsalted butter, cubed and softened at room temperature (don't use salted butter!)
pink, blue, yellow, purple, green food colouring
CHOCOLATE DOMES
400 g The Kate Tin Milk or Dark Baking Chocolate,
melted and cooled
8-hole silicone dome mould (see TIP)
200 g The Kate Tin White Baking Chocolate, melted
sprinkles, popping candy, edible glitter, to fill
pink, green, yellow, blue powder food colouring
Instructions
Preheat the oven to 180 °C (160 °C for fan-forced). Prepare 3 springform cake tins (18 cm each).
For the cake, mix all the dry ingredients together. Whisk the eggs, buttermilk and vanilla and add to the dry ingredients. Combine the coffee, peanut butter and butter and add to the mixture. Mix well.
Pour 300 g of the mixture into the prepared cake tins and bake for 15–20 minutes or until a skewer
comes out clean. Allow to cool for 10 minutes before inverting and allowing to cool completely. Clean and prepare the cake tins again and bake the remaining batter to make the last two layers.
To make the buttercream, fill the bottom of a saucepan with water and bring it to a gentle simmer.
Place the egg whites and sugar in a bowl that fits over the saucepan and place the bowl over the hot water, stirring gently with a whisk (don’t whisk to aerate the mixture). Keep stirring until the mixture reaches 60 °C on a sugar thermometer or until the egg whites are hot to the touch. Transfer the hot mixture to the bowl of a stand mixer and, using the whisk attachment, whip the mixture on high until light and fluffy. Continue whipping for a good 10 minutes or until the meringue is cool to the touch. In the meantime, melt the white chocolate and oil together until smooth and set aside to cool. Slowly add the butter, one block at a time, to the meringue until it is thick, glossy and velvety. Check the temperature of the melted white chocolate – it should be cool to the touch – then whip it into the buttercream. Divide the buttercream into five batches and tint each using the gel food colouring. Place each colour into a piping bag and snip off the tip.
To assemble the cake, place one layer on a cake stand or serving plate, then pipe dots of green icing to cover the cake. Top with the second cake layer, and pipe dots of another colour of icing on top. Repeat the process, finishing with a layer of icing dots.
To make the chocolate domes, fill the silicone dome mould with the melted and cooled dark or
milk chocolate (it shouldn’t be hot or it will melt the splatters), then flip the mould over the bowl of melted chocolate and allow the excess chocolate to drip out.
Allow to set in the fridge and repeat the process to form a nice thick shell.
Once set, pop the domes out of the mould. Fill one dome with a mixture of sprinkles, popping candy and edible glitter. Dip the edges of another dome in a little melted chocolate (you could also use a hot baking tray), then ‘glue’ the empty dome on top of the one filled with sprinkles to form a ball. Seal the edges and allow to set. Repeat with the remaining balls.
Divide the white chocolate into four small bowls and tint each a different colour. Splatter and splash the various coloured chocolates onto the domes and allow to set. Arrange the chocolate balls on top of the cake and top with sparklers. To serve, smash the balls with the back of a spoon to release the sprinkles inside!
Notes
TIP: You could also bake this cake in three tins and then cut each cake in half to make six layers.
The remaining layer you can wrap and freeze for cake emergencies!
Silicone dome moulds are available at baking or plasticware shops but if you can’t find them, you
can also use 6 to 8 small water balloons that have been washed well. Simply dip the balloons in the chocolate first, and then splatter with the coloured white chocolate.
This is my favourite chocolate cake recipe straight from my new cookbook ‘Chocolate’. The sponge is a one-bowl wonder that’s rich and moist. It’s sandwiched together with a chocolate Swiss Meringue Buttercream of dreams!
SPONSORED
If you’re still reading this after looking at that picture and haven’t already scrolled down to the recipe, then well done, you! This is my most requested chocolate cake. It’s undergone a few changes since the first time I made it with a Milo twist a few years ago. And it got a bit grown-up too with a slathering of the smoothest chocolate Swiss Meringue Buttercream of your life.
My new cookbook ‘Chocolate’
This recipe is straight from my brand new cookbook, Chocolate which has been in the top 6 bestselling cookbooks on Loot.co.za since it launched just 3 weeks ago! Yay! The cookbook was art directed and styled by me and photographed by my insanely talented friend, Hein van Tonder. If you haven’t already checked out his blog, Heinstirred, then you’re missing out! But back to this incredible cake!
Katelyn’s Chocolate Cake
This chocolate cake is one of my favourites mainly because it is so easy. We all love a one-bowl wonder and this is one of mine. But obviously, I have one or two secrets to making it really special.
1) Use sugar with flavour! I used my favourite Natura Sugars Soft Brown Sugar which has a lovely fudgy flavour because it’s unrefined. The sugar is also lovely and moist so really stops the cake being dry.
2) Add some espresso. Did you know coffee actually enhances the flavour of chocolate and makes chocolate recipes taste more chocolatey? Jip, it’s a thing!
The Swiss Meringue Buttercream
I went for convenience in the sponge because I’d rather spend time on the frosting. Making the Swiss Meringue buttercream really takes this cake to another level. Again, I used a sugar loaded with flavour to balance the sweetness – the Natura Sugars Golden Caster Sugar has a subtle caramel flavour that works so well and it is super fine so dissolves easily leaving a velvety smooth buttercream!
Katelyn's Chocolate Cake
2018-12-13 12:15:55
Serves 10
My favourite super-moist chocolate cake, covered in my favourite chocolate buttercream. I hope it becomes your favourite, too!
Print
Prep Time
30 min
Cook Time
1 hr
Total Time
1 hr 30 min
Prep Time
30 min
Cook Time
1 hr
Total Time
1 hr 30 min
0 calories
0 g
0 g
0 g
0 g
0 g
0 g
0 g
0 g
0 g
0 g
Nutrition Facts
Serving Size
0g
Servings
10
Amount Per Serving
Calories0
Calories from Fat 0
% Daily Value *
Total Fat 0g
0%
Saturated Fat 0g
0%
Trans Fat 0g
Polyunsaturated Fat 0g
Monounsaturated Fat 0g
Cholesterol 0mg
0%
Sodium 0mg
0%
Total Carbohydrates 0g
0%
Dietary Fiber 0g
0%
Sugars 0g
Protein 0g
Vitamin A
0%
Vitamin C
0%
Calcium
0%
Iron
0%
* Percent Daily Values are based on a 2,000 calorie diet. Your Daily Values may be higher or lower depending on your calorie needs.
125g quality dark chocolate (70% cocoa), finely chopped (you can double this amount if you want it seriously chocolatey!)
10ml (2 tsp) vegetable or canola oil
500g (500ml) unsalted butter, cubed and softened at room temperature (see note)
Instructions
Preheat the oven to 180°C (160°C for fan-forced). Prepare 3 springform cake tins (22 cm each).
Mix all the dry ingredients together. Whisk the eggs, buttermilk and vanilla, and add to the dry ingredients. Combine the coffee, peanut butter and butter, and add to the mixture. Mix well. Divide between the three cake tins and bake for 30 to 40 minutes or until a skewer comes out clean. Allow to cool for 10 minutes before inverting and allowing to cool completely. Level off the tops of the cake with a sharp knife.
To make the buttercream, fill the bottom of a saucepan with water and bring it to a gentle simmer. Place the egg whites and sugar in a bowl that fits over the saucepan and stir gently with a whisk (don’t whisk to aerate the mixture). Keep stirring until the mixture reaches 60°C on a sugar thermometer or until the egg whites are hot to the touch. Transfer the hot mixture to the bowl of a stand mixer and, using the whisk attachment, whip the mixture on high until light and fluffy. Continue whipping for a good 10 minutes or until the meringue is cool to the touch. In the meantime, melt the chocolate and oil together until smooth and set aside to cool.
Slowly add the butter, one block at a time, to the buttercream until it is thick, glossy and velvety. Check the temperature of the melted chocolate and oil – it should be cool to the touch – then whip it into the buttercream. Store the buttercream at room temperature until ready to use. Assemble the cake by layering the buttercream and sponge layers alternately, then frost the outside of the cake, scraping any excess off with a palette knife, to reveal the sponge layers. Serve drizzled with melted dark chocolate, if desired.
Notes
TIP: Never make buttercream using salted butter or margarine as the salt content is too high and the buttercream will be inedible.
By TheKateTin.com
Adapted from 'Chocolate' published by Human & Rousseau
beta
calories
0
fat
0g
protein
0g
carbs
0g
more
Adapted from 'Chocolate' published by Human & Rousseau
The Kate Tin https://thekatetin.com/
NOTE: Natura Sugars are available at selected Checkers, Clicks and Spar stores nationwide or online from Faithful to Nature.
My cookbook ‘Chocolate’ is available at all bookstores nationwide (if they don’t have a copy, ask them so they can order one for you), or online at Loot, Exclusive Books and Takealot.
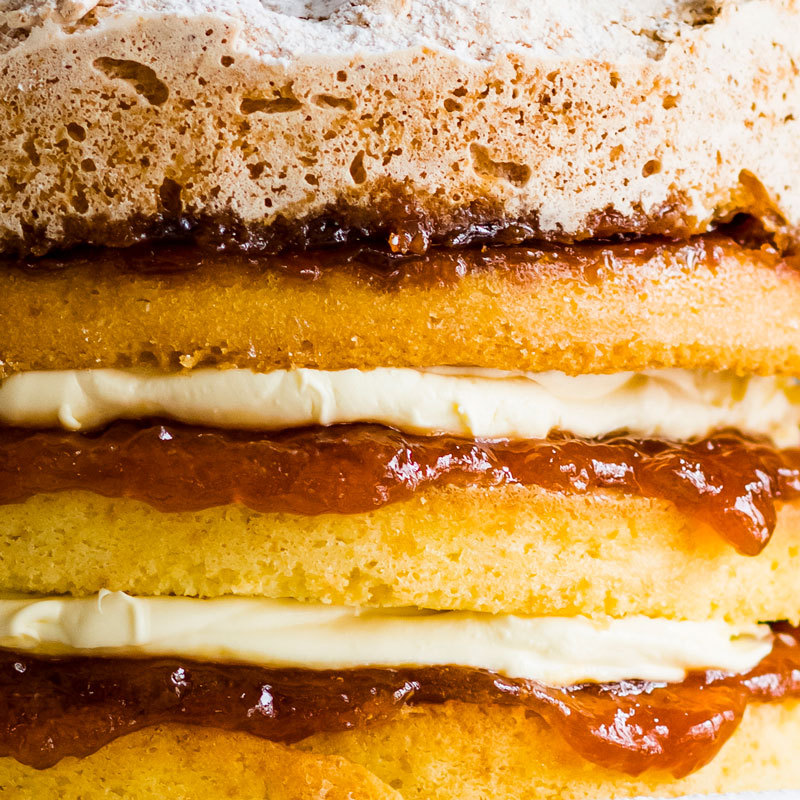
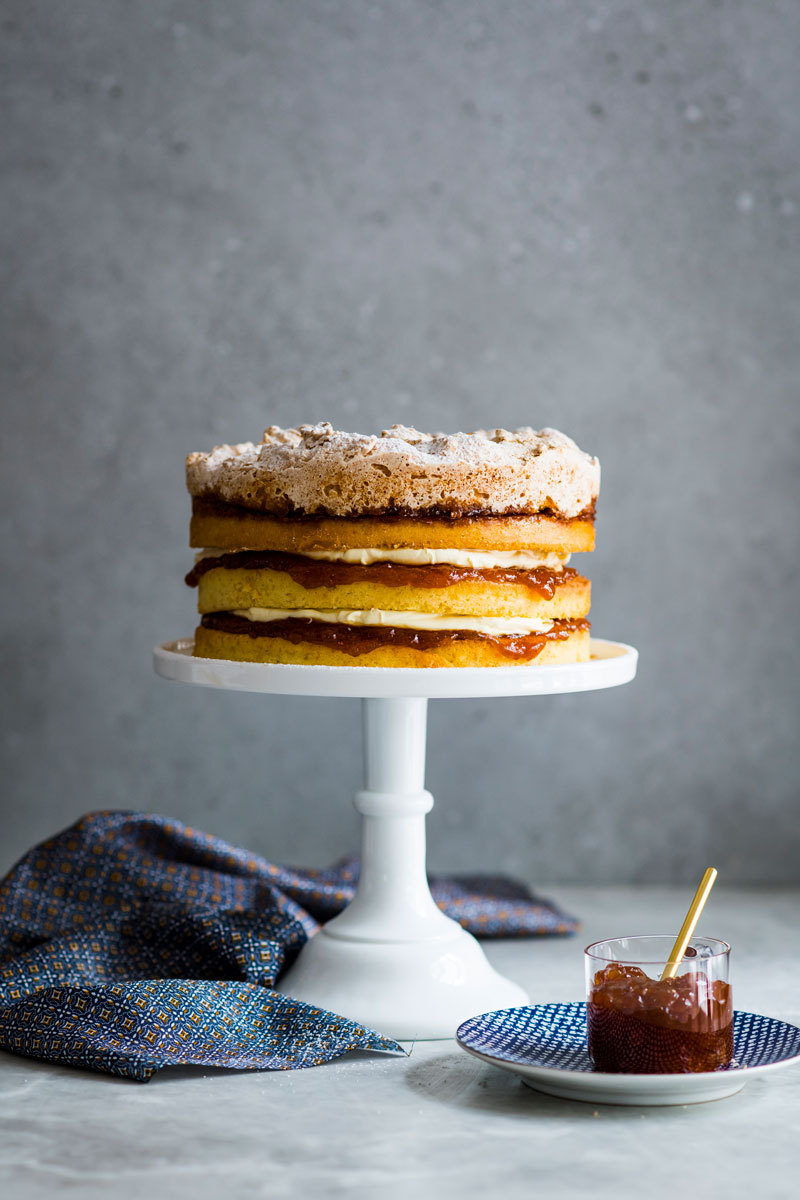
A spin on the South African hertzoggie, this Hertzoggie Cake consists of a light coconut sponge cake with crunchy coconut meringue topping and is layered with whipped cream and apricot jam.
#SPONSORED
Do you know what a hertzoggie is? It’s one of the bakes us South Africans are immensely proud of. Like koeksisters, malva pudding, and peppermint crisp tart (there are loads more but these are my favourites!). Hertzoggies are little tarts with a crisp, shortcrust pastry bottom filled with apricot jam and then topped with crispy coconut meringue. It’s a heavenly combination that is only made better with a cup of rooibos tea! This Hertzoggie cake is inspired by those little tarts.
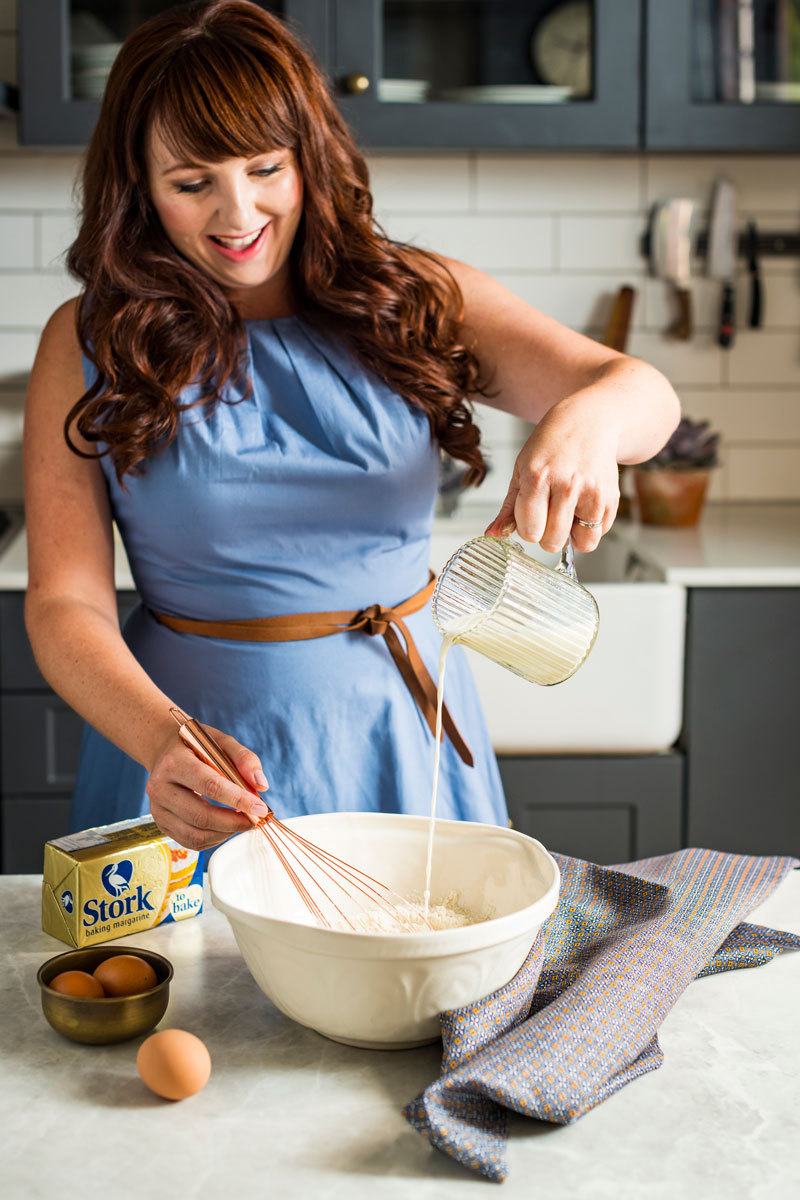
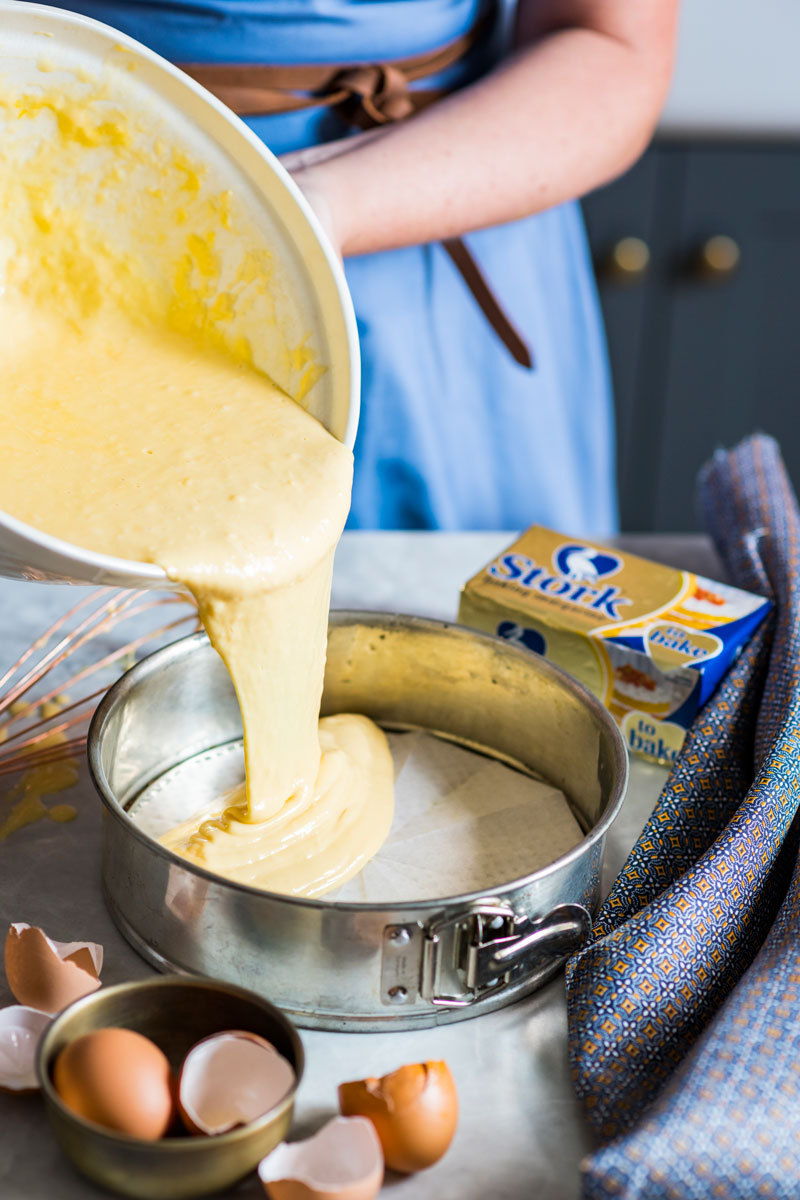
When the team over at Stork Bake challenged me to make a Mother’s Day bake for their Mmmmzansi campaign (such a cute name!), I immediately knew which cake I wanted to make. On page 51 of my grandmother’s handwritten recipe book, there’s a recipe for ‘Stork Sponge Cake’. The recipe is dated back to 1967 – she wrote it down over 50 years ago! It’s one of my favourite recipes for a reason; all the ingredients get added to a bowl and mixed for 3 minutes. It has never failed me.
Although the cake batter is very easy, the golden rule of baking applies specifically to this recipe. All your ingredients MUST be at room temperature – particularly the Stork Bake. If not, your cake batter will curdle and won’t be as light and fluffy as it should be. My grandmother probably didn’t know it at the time, but using Stork Bake is the secret to getting a better rise on your cakes – and that’s something even Mary Berry and Paul Hollywood preach about!
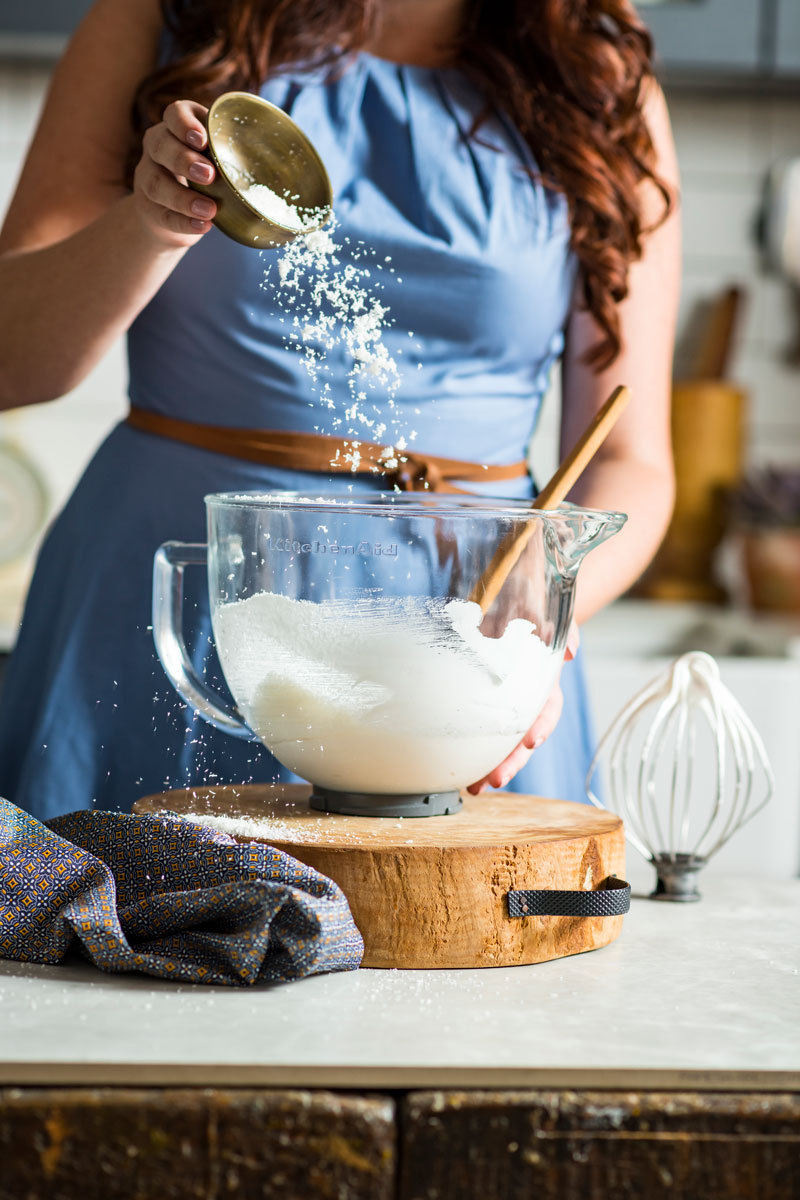
Apart from the very special recipe, there are some other rather special features to this cake. The coconut meringue topping is baked onto the cake batter so it really is as crispy and crunchy as the hertzoggies it’s named after! Then lastly, make sure you use the best apricot jam you can find – or make your own – no storebought jam here, please!
My hertzoggie cake is slathered with a thick layer of Tannie Anita Boonzaaier’s Appelkooskonfyt (apricot jam). My friend Lehan’s mom makes THE BEST apricot jam and each year I get a jar which I am pedantic about using. This cake? It deserved the entire jar because it is THAT good.
Hertzoggie Cake
2019-05-06 13:11:43
Serves 8
A light coconut sponge cake with crunchy coconut meringue topping is layered with whipped cream and apricot jam.
Print
Prep Time
30 min
Cook Time
45 min
Total Time
1 hr 15 min
Prep Time
30 min
Cook Time
45 min
Total Time
1 hr 15 min
0 calories
0 g
0 g
0 g
0 g
0 g
0 g
0 g
0 g
0 g
0 g
Nutrition Facts
Serving Size
0g
Servings
8
Amount Per Serving
Calories0
Calories from Fat 0
% Daily Value *
Total Fat 0g
0%
Saturated Fat 0g
0%
Trans Fat 0g
Polyunsaturated Fat 0g
Monounsaturated Fat 0g
Cholesterol 0mg
0%
Sodium 0mg
0%
Total Carbohydrates 0g
0%
Dietary Fiber 0g
0%
Sugars 0g
Protein 0g
Vitamin A
0%
Vitamin C
0%
Calcium
0%
Iron
0%
* Percent Daily Values are based on a 2,000 calorie diet. Your Daily Values may be higher or lower depending on your calorie needs.
40g (140ml or 1/2 cup + 1 tbsp) desiccated coconut
Pinch of salt
3 large eggs, at room temperature
260ml (1 cup + 2 tsp) coconut milk, at room temperature
100ml milk (1/3 cup + 4 tsp), at room temperature
TOPPING
170g (125ml or ½ cup) smooth apricot jam, plus extra for spreading
4 large egg whites, at room temperature
230g (250ml or 1 cup) castor sugar
155g (500ml or 2 cups) dessicated coconut
Icing sugar, for dusting
500ml (2 cups) cold cream, whipped
Instructions
Preheat the oven to 170°C (150°C fan-forced) and line 3 x 20cm springform cake tins with baking paper.
Place the STORK Bake, castor sugar, flour, baking powder, coconut and salt in the bowl of an electric mixer fitted with a paddle attachment and mix together on a low speed until a sandy texture forms.
Whisk the eggs, coconut milk and milk together in a jug then slowly add to the dry ingredients while the mixer is running, to form a batter. Don’t overmix.
Divide the cake batter evenly between the prepared tins. Bake the cakes for 20 minutes.In the meantime, prepare the coconut meringue topping. Whisk the egg whites until soft peak stage then beat in the castor sugar until thick and glossy. Fold in the coconut.Remove one of the cakes from the oven and working quickly, drizzle over ⅓ of the apricot jam and spread the coconut meringue mixture over the top. Return the cake to the oven and bake for a further 15-20 minutes or until a skewer inserted comes out clean.
Allow to cool a little in the tin before turning out onto a cake rack. Trim the cooled cake layers (without the meringue on) by levelling the tops then place one cake layer on a serving plate. Sandwich the cake layers with apricot jam and whipped cream finishing with the coconut-topped layer. Dust with icing sugar, to serve.
A light red velvet sponge cake and cream cheese frosting are the perfect base for this festive Christmas candy cane cake!
SPONSORED
Not everyone is a fruitcake fan – in fact, I think I know more people who hate fruitcake than love it! This cake is for all of you fruitcake haters. The beautiful colour of the red velvet cake still makes it festive and piling candy canes on top? Well, that’s always a good idea – and a very effective way to decorate a Christmas cake. Otherwise, try this idea or this one!
The red velvet cake is made the old-fashioned way with cocoa powder, vinegar, bicarbonate of soda and buttermilk which gives it the red colour – although I have bumped the colour up a bit using red food colouring. I do this mainly because it’s almost impossible to find natural (not Dutch-processed) cocoa powder in South Africa. But if you can find it and you’d prefer a more natural, old-fashioned colour, then simply leave out the colouring and let the chemistry magic happen.
This recipe comes straight out of my (now famous) Great Aunt May’s cookbook which is a good 60 years old. The recipe specifically calls for Stork Bake and since Great Aunt May knows best, I don’t mess with tradition! It makes the sponge light, fluffy and so moist. And since we’re splurging with full-fat cream cheese for the frosting, I added Stork Bake in the frosting too. Because not everyone can afford to take out a bond just for a block of butter, right?! Do you have an old family recipe that you always love to make? Tell me about it in the comments below!
Red Velvet Candy Cane Cake
2018-12-14 11:17:18
Serves 8
A light red velvet sponge with cream cheese frosting and a festive Christmas touch.
Print
Prep Time
30 min
Cook Time
40 min
Total Time
50 min
Prep Time
30 min
Cook Time
40 min
Total Time
50 min
0 calories
0 g
0 g
0 g
0 g
0 g
0 g
0 g
0 g
0 g
0 g
Nutrition Facts
Serving Size
0g
Servings
8
Amount Per Serving
Calories0
Calories from Fat 0
% Daily Value *
Total Fat 0g
0%
Saturated Fat 0g
0%
Trans Fat 0g
Polyunsaturated Fat 0g
Monounsaturated Fat 0g
Cholesterol 0mg
0%
Sodium 0mg
0%
Total Carbohydrates 0g
0%
Dietary Fiber 0g
0%
Sugars 0g
Protein 0g
Vitamin A
0%
Vitamin C
0%
Calcium
0%
Iron
0%
* Percent Daily Values are based on a 2,000 calorie diet. Your Daily Values may be higher or lower depending on your calorie needs.
80ml liquid red food colouring (or a few drops red gel food colouring)
2 tsp vanilla extract or essence
600g cake flour
pinch of salt
500ml buttermilk
2 tbsp white vinegar
2 tsp bicarbonate of soda
For the icing
200g Stork Bake margarine, softened
1,2kg icing sugar, sifted
480g full fat cream cheese
2 tsp vanilla extract
Candy canes, to decorate
Instructions
Preheat the oven to 190 degrees Celcius (170C fan forced). Grease and line 3 x 20cm cake tins.
Cream the Stork and castor sugar until light and fluffy – about 8 minutes. Add the eggs one at a time, beating well between each addition.
Add the cocoa powder, food colouring and vanilla and mix well.
Sift together the flour and salt and add this to the creamed mixture, alternating with the buttermilk.
Mix the vinegar and bicarbonate of soda together then add this to the cake mix and mix well. Divide the batter between the cake tins, smooth the top of each cake and bake for 30-40 minutes or until springy to the touch and a skewer inserted in the middle comes out clean. Allow the cakes to cool for 10 minutes then turn them out on a cooling rack.
Prepare the frosting by creaming together the Stork Bake and icing sugar together until light and fluffy – about 8 minutes. Add the cream cheese and mix until just incorporated. Add the vanilla extract. Place the frosting in a piping bag fitted with a plain nozzle.
Once the cakes are cool, level off the tops (save the cake crumbs), then start assembling the cakes by piping blobs of icing onto each layer and stacking them on top of each other. Finish the cake with blobs of icing, press the candy canes into the top, sprinkle with the crumbled up leftover cake and serve.
A Christmas showstopper; light eggnog sponge cakes layered with nutmeg buttercream and a white chocolate drip that makes these cakes look just like candles!
YES, IT'S CAKE!
Two weeks ago I posted these white chocolate candle cakes on my Instagram page and within hours it went viral! Which is not surprising because it was beautiful enough to grace the cover of the December issue of Food & Home Entertaining Magazine. It really is a beauty and I had so much fun making (and shooting) it - and I know you will too! Imagine putting this on the Christmas table as decor. Then, when it's time for dessert, whip out the matches, light the candle cakes and watch your guests faces as you slice the candles for pudding! I do love a dessert that doubles as a centrepiece - check out this one or this one!
THE FLAVOURS
The sponge cake itself is super light - so take care when folding and sifting so you keep as much air as possible in it! The sponge is infused with cinnamon and other spices which are echoed in the nutmeg Swiss Meringue Buttercream. If you can, try get the whole nutmeg and grate it into the buttercream. The freshly grated nutmeg really makes it. Oh, and how could I forget the rum. There's lots of rum! It's Christmas, afterall. To make the 'wax drip' I simply melted my own baking white chocolate (did you know I launched my own range of chocolates?!) and piped it down the cake. Click HERE if you want to buy The Kate Tin White Baking Chocolate.
CAKE TINS
If you're wondering what cake tins I used, I opted for a 15cm (my favourite size which you can get here) for the large candle and created 4 layers to make it nice and tall. For the smaller candles, I simply used tins! The larger tin was from some canned fruit I had lying around and the smaller tin was a bog standard tin of tomatoes. Tin cans make really great cake tins - just be sure to grease them thoroughly. So now you've saved the environment AND you get to eat cake. Boom!
Note: this recipe makes the 3 candles above - if you want to make just one candle, half the recipe below.
Dripping White Chocolate Candle Cake
2018-12-13 13:16:10
Serves 8
Dripping white chocolate “candle” cakes with eggnog sponge and nutmeg-rum buttercream icing
Print
0 calories
0 g
0 g
0 g
0 g
0 g
0 g
0 g
0 g
0 g
0 g
Nutrition Facts
Serving Size
0g
Servings
8
Amount Per Serving
Calories0
Calories from Fat 0
% Daily Value *
Total Fat 0g
0%
Saturated Fat 0g
0%
Trans Fat 0g
Polyunsaturated Fat 0g
Monounsaturated Fat 0g
Cholesterol 0mg
0%
Sodium 0mg
0%
Total Carbohydrates 0g
0%
Dietary Fiber 0g
0%
Sugars 0g
Protein 0g
Vitamin A
0%
Vitamin C
0%
Calcium
0%
Iron
0%
* Percent Daily Values are based on a 2,000 calorie diet. Your Daily Values may be higher or lower depending on your calorie needs.
500g The Kate Tin White Baking Chocolate, melted, for dripping
3 x white birthday candles, wax trimmed off to reveal the wick, to decorate
Instructions
Preheat the oven to 180˚C. Grease and line 4 round cake tins (with a 15cm diameter and 5cm depth each), 1 x 900g tin can (with a diameter of 10cm) and 1 x 450g tin can (with a diameter of 7cm) with baking paper. Set aside until needed.
Place the whole eggs, egg yolks, vanilla essence and ½ of the white sugar in a glass/metal bowl.
Place the bowl over a pot of barely simmering water (do not allow the base of the bowl to touch the water). Stir constantly until the mixture reaches 48˚C on a sugar thermometer. Remove from heat and transfer the mixture to the bowl of a stand mixer fitted with a whisk attachment.
Beat on high speed until the mixture thickens and reaches ribbon stage, about 1 minute. Set aside until needed.
In a separate bowl, combine the ground almonds, white bread flour and ground cinnamon. Set aside.
Place the 10 egg whites in the bowl of a hand-held/stand mixer. The bowl must be scrupulously clean and dry or the whites won’t reach full volume.
Beat the egg whites until soft peaks form. Gradually add the remaining ½ of the white sugar, beating continuously until incorporated well. Set aside.
Fold the almond mixture (from step 3) into the whipped whole-egg mixture (from step 2). Stir in the melted butter. Fold in the whipped egg whites.
Divide the batter among the prepared cake tins and tin cans, filling each cake tin and tin can ¾ of the way up to allow for rising during baking. Bake in the preheated oven until a skewer inserted into the centres of each of the cakes comes out clean, about 20 – 25 minutes.
Remove from oven and set aside to cool in the tins, about 5 minutes, before turning the cakes out on wire cooling racks to cool completely.
For the buttercream, place the 150g egg whites and castor sugar in a glass bowl. Place the bowl over a pot of barely simmering water (do not allow the base of the bowl to touch the water). Using a whisk, gently stir the mixture until it reaches 60˚C on a sugar thermometer or until the mixture is hot to the touch. Be mindful not to aerate the mixture when stirring.
Remove from heat and transfer the mixture to the bowl of a stand mixer fitted with a whisk attachment. Beat on high speed until light and fluffy, about 10 – 15 minutes. While beating, add the unsalted butter one cube at a time, beating to incorporate each addition before adding the next. Add the rum and freshly grated nutmeg. Beat until incorporated well.
To assemble the cakes, start with the 4 largest sponges. Use a serrated bread knife to cut a very thin slice off the top of each cake to create a flat surface. Stack the cakes on top of one another, spreading a thick layer of the buttercream between each sponge. Use a spatula or palette knife to spread some of the buttercream over the outside of the cake. Set aside.
For the 2 smaller cakes, cut the sponges into 3 equal parts and cover with buttercream as mentioned in the previous step.
Place the melted chocolate (make sure it's not hot - room temperature is good) in a small piping bag fitted with a plain nozzle. Slowly pipe the chocolate down the sides of the cakes, creating a drip.
Wait 5 minutes for the chocolate to set before piping a second layer of drip onto each cake – to speed up this process, place the cakes in the freezer for a couple of minutes between piping a new layer of chocolate. The aim is to build up the drips until you’ve created a layered effect.
Carefully place each cake on a candlestick large enough to support its weight. Set aside.
Using a sharp knife, trim the wax off the birthday candles to reveal the wicks, leaving about 1cm of wax intact at the bottom of each candle.
Place 1 candle on top of each cake, pressing down until the 1cm of candlewax is pushed into the sponge. Light the wicks when ready to serve.
Notes
I used recycled jam tins for the smaller-sized cake moulds.